[Motherboard] AI Suite 3 — Introduction
[Motherboard] AI Suite 3 — Introduction AI Suite 3 has two functions — one is to monitor the system status, the other is to integrate ASUS software so that it is easy to access the ASUS software through AI Suite 3. To provide you more detailed instruction, you can also click ASUS Youtube video link below to know more about AI Suite 3 https://www.youtube.com/watch?v=MVS2Bx8Uofg How to use AI Suite 3 1. Click Windows icon, and click AI Suite 3 to open it. 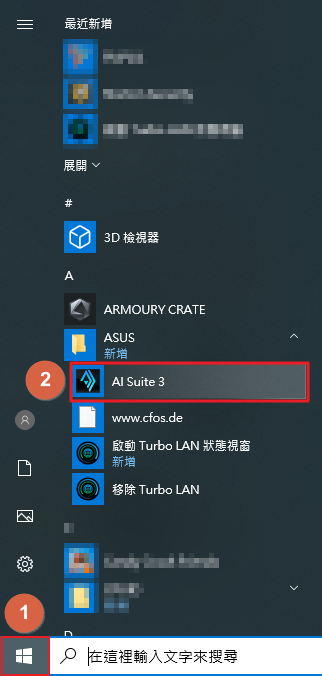 2. User can monitor CPU frequency, Voltage, Temperature, Fan through AI Suite 3. *Example below: PRIME X299 EDITION 30
 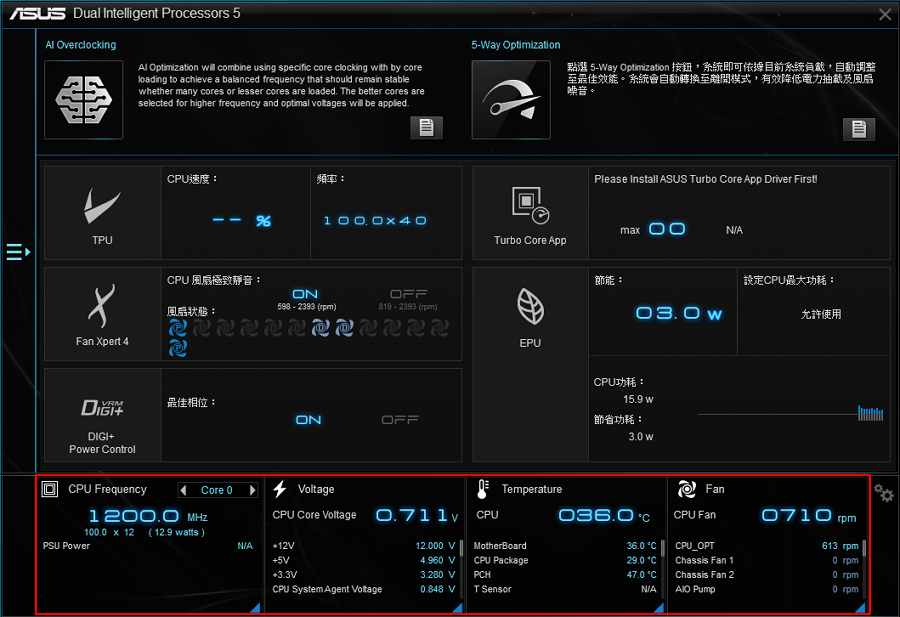 3. Click the blue triangle to check CPU frequency and CPU usage. *CPU frequency affects CPU efficiency. *CPU usage means the CPU is used in a period of time. The following figure shows the CPU usage of 6-cores 12-threads.
  4. Click the blue triangle to monitor each voltage range. *+12V provides voltage to CPU, graphic card and PCI express. *+5V provides voltage to memory, Input / Output port and SSD. *+3.3V provides voltage to PCI express, south bridge and LAN on motherboard.
  5. Click the blue triangle to monitor temperature ranges, such as CPU, PCH, VRM, PSU, etc.
 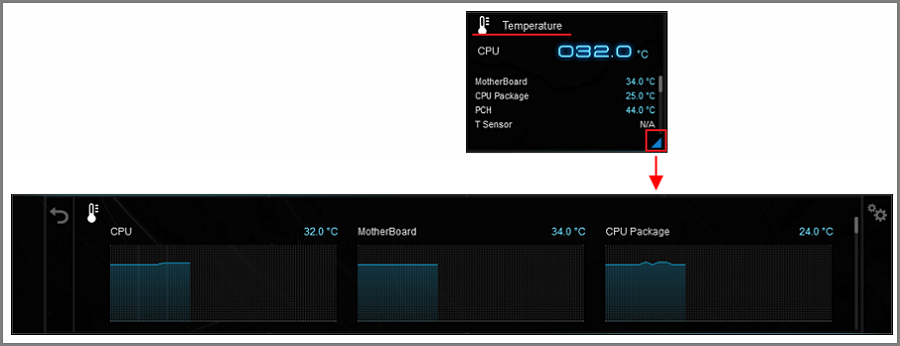 6. Click the blue triangle to monitor the rotating speed of each fan.
 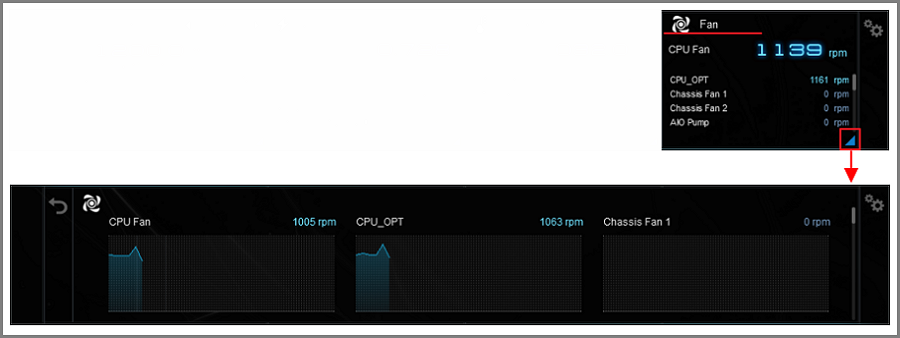 7. Click the back icon
  , and click the list icon
  to open the software list.
 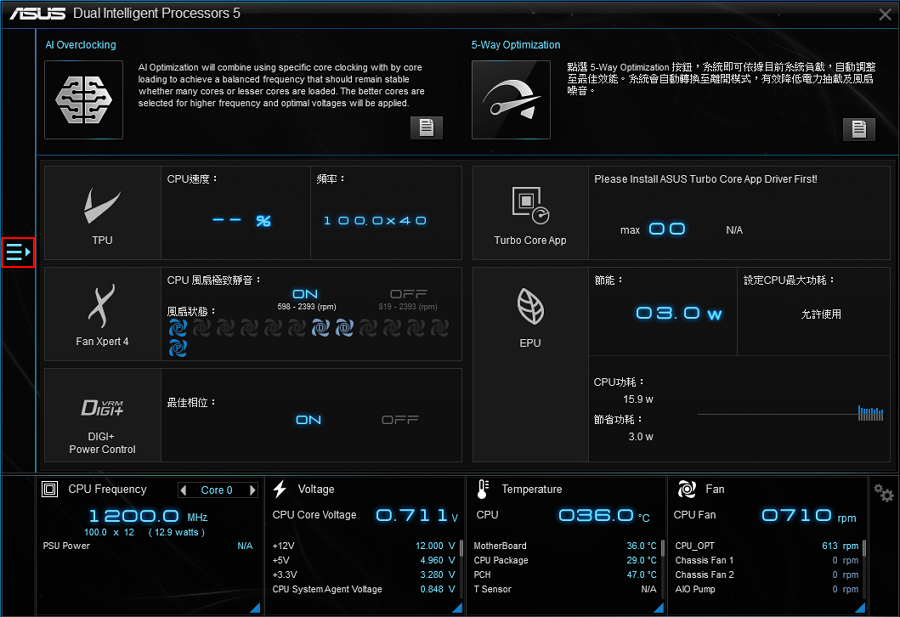 8. Click to open the software. Software list may differ from motherboard to motherboard.
 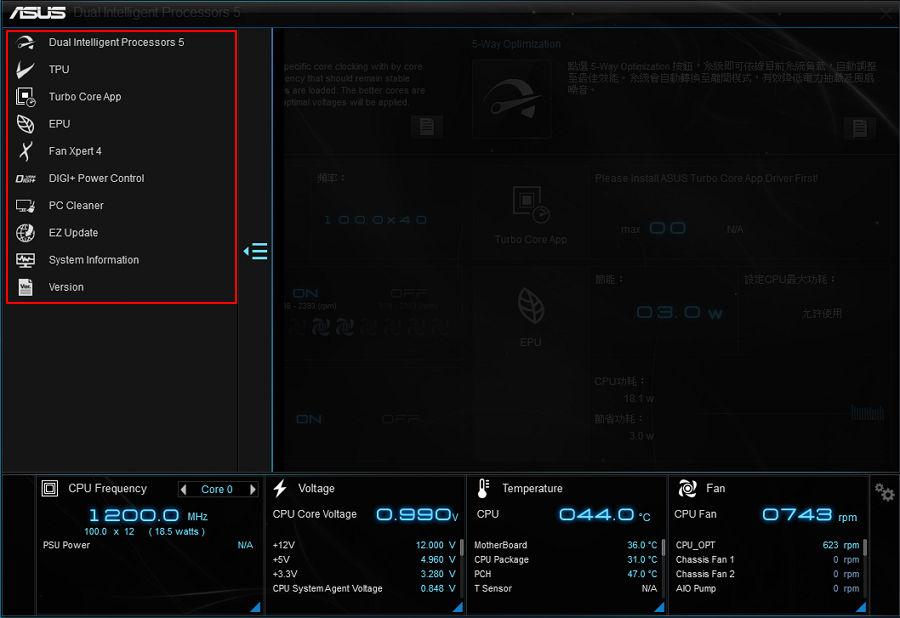 9. For each software, please refer to the related topics for more details. System information provides the information of MB, CPU and SPD. Version provides software version in AI Suite 3 and system version.
  FAQ Q1: How to install AI Suite 3? A1: Step 1: Go to ASUS download center. https://www.asus.com/support/Download-Center/ Step 2: Enter your model name.
 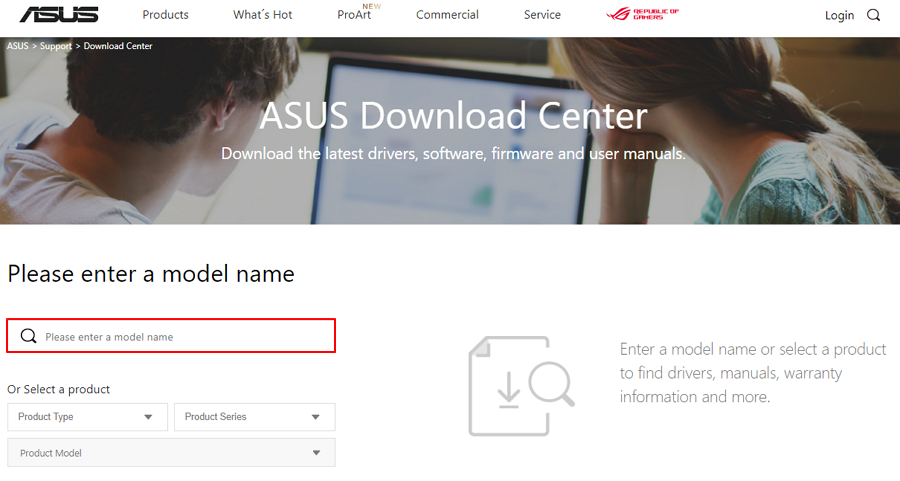 Step 3: Click Driver & Utility.
  Step 4: Choose your Operating system and download the latest AI Suite 3 from Utility.
 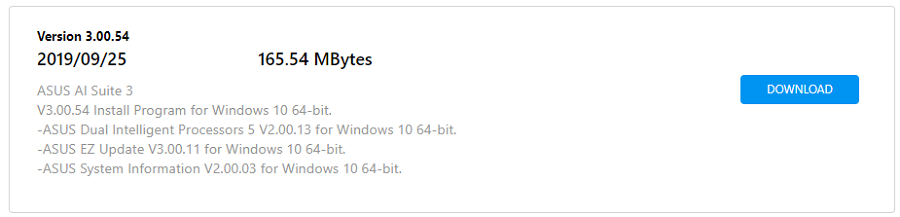 Step 5: Extract the files and open AsusSetup.
 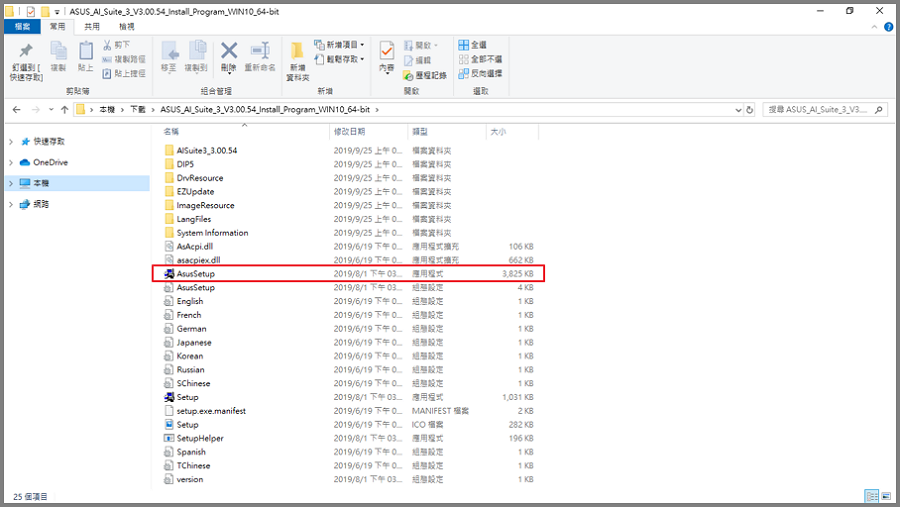 Step 6: Click the program you want to install, then click Install. (We recommend to install all programs that will help monitor your system more easily)
 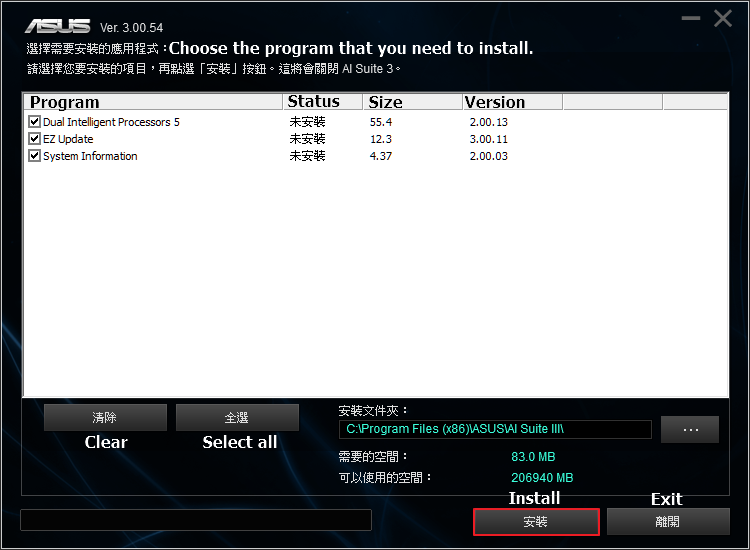 Step 7: Click OK when AI Suite 3 has finished the installation.
 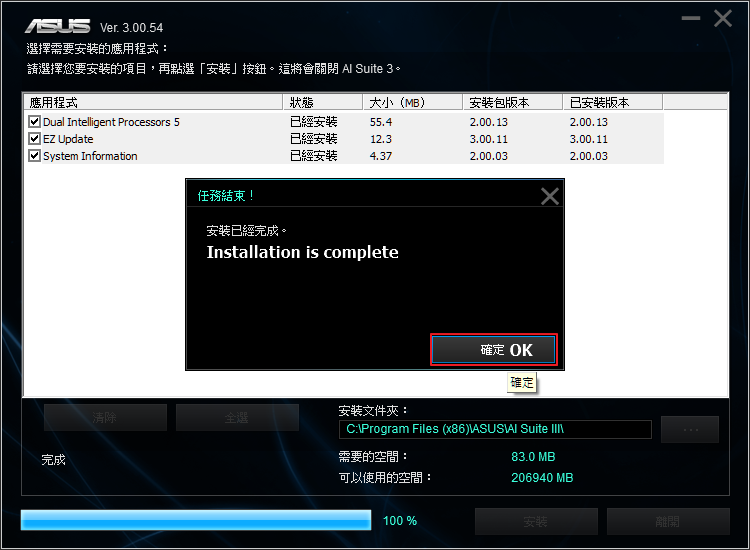 Q2: How to uninstall AI Suite 3? A2: Step 1: Open Windows settings, and click Apps.
 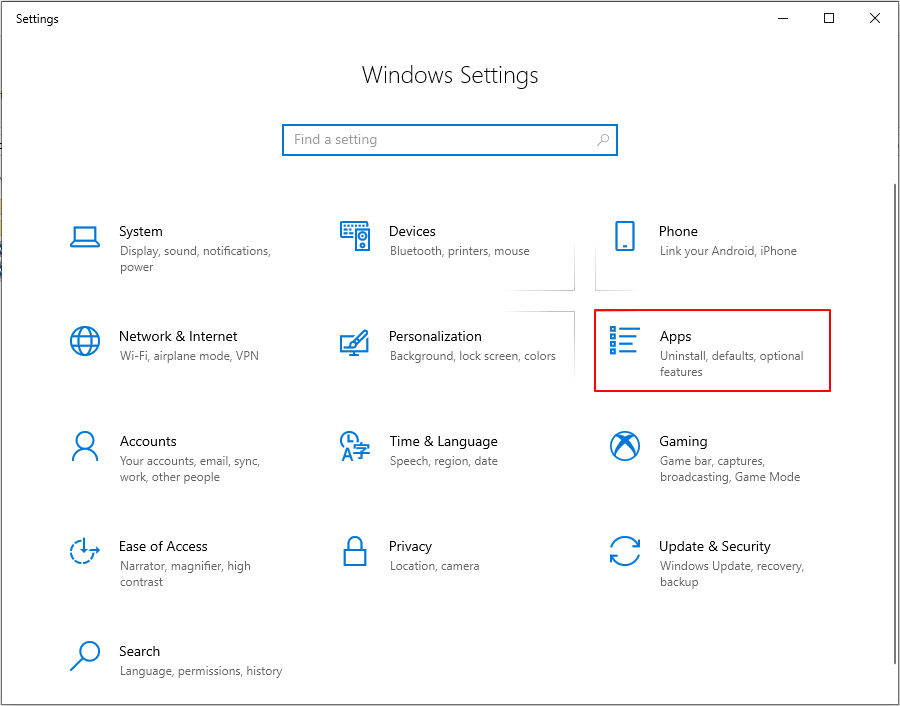 Step 2: Choose AI Suite 3, and click Uninstall.
 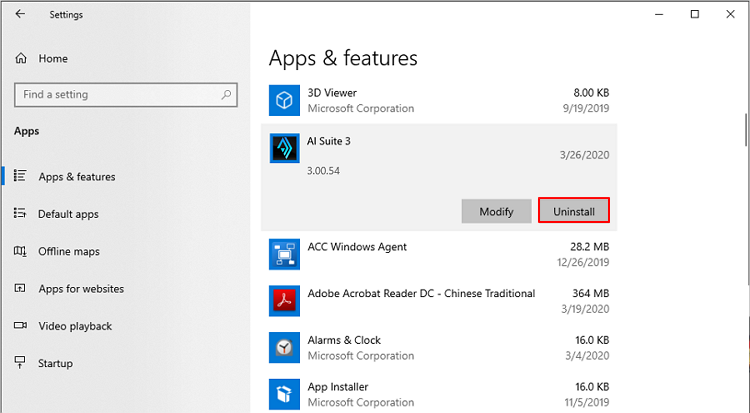 Step 3: Choose the program that you are going to uninstall and click Uninstall.
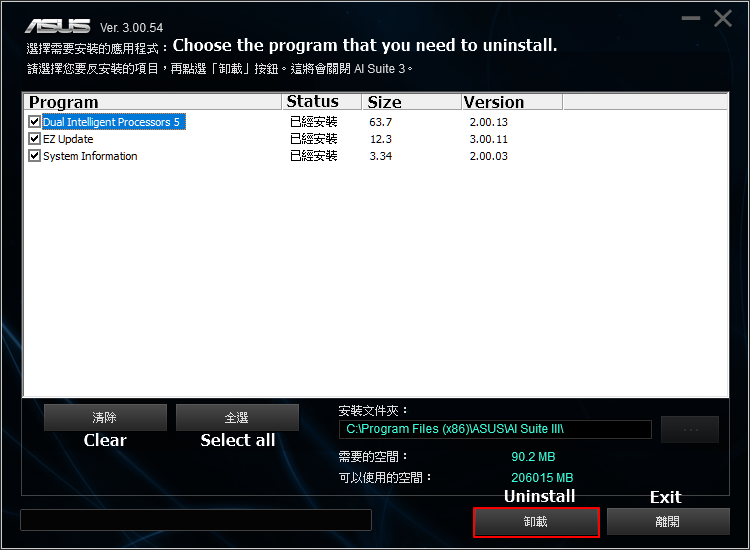
Was this information helpful?
What we can do to improve the article? Submit Skip
Contact Support
Please contact with us if the above information cannot resolve your problem
Get the support
- Above information might be partly or entirely quoted from exterior websites or sources. please refer to the information based on the source that we noted. Please directly contact or inquire the sources if there is any further question and note that ASUS is neither relevant nor responsible for its content/service
- This information may not suitable for all the products from the same category/series. Some of the screen shots and operations could be different from the software versions.
- ASUS provides the above information for reference only. If you have any questions about the content, please contact the above product vendor directly. Please note that ASUS is not responsible for the content or service provided by the above product vendor.
- Brand and product names mentioned are trademarks of their respective companies.
- Laptops
- Phone
- Motherboards
- Tower PCs
- Monitors
- Networking
- Show All Products
-
Item_other —>
- Tablets
- AIoT & Industrial Solutions
- Gaming handhelds
- Power Supply Unit
- Gaming Case
- Cooling
- Graphics Cards
- ROG — Republic Of Gamers
- Projectors
- Single Board Computer
- VivoWatch
- Mini PCs
- Business Networking
- Sound Cards
- Vivobaby
- Stick PCs
- Headphones & Headsets
- Optical Drives & Storage
- All-in-One PCs
- Gaming Networking
- Commercial
-
Commercial_list.Item —>
- Motherboard
- Intelligent Robot
- Data Storage
- Mini PCs
- All-in-One PCs
- Signage
- Gaming Station
- Laptops
- Desktop
- Monitors
- Servers & Workstations
- Projectors
- Networking
- Tablets
- Warranty check
- Check repair status
- Find Service Locations
- Product Registration
- ASUS Support Videos
[Материнская плата] AI Suite 3 — Обзор
[Материнская плата] AI Suite 3 — Обзор Как использовать AI Suite 3 1. Нажмите на значок Windows, выберите AI Suite 3, чтобы открыть его. 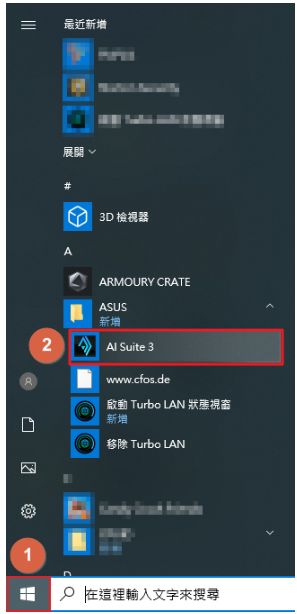 2. Вы можете контролировать частоту процессора, напряжение, температуру, вентилятор через AI Suite 3. *Например, PRIME X299 EDITION 30.
 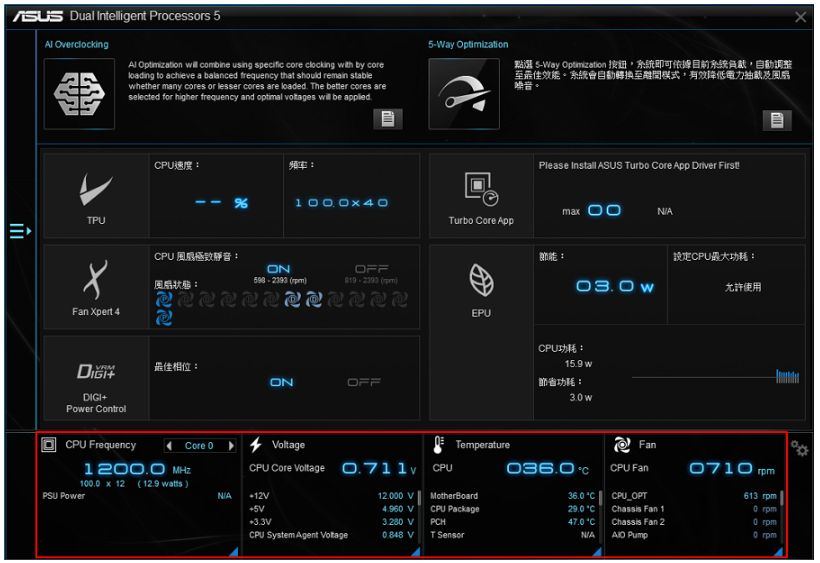 3. Нажмите синий треугольник, чтобы проверить частоту процессора и его загрузку. *Частота процессора влияет на эффективность процессора. *Использование ЦП означает, что ЦП используется в течение определенного периода времени, на следующем рисунке показано использование ЦП для 6-ядерных 12-потоков.
 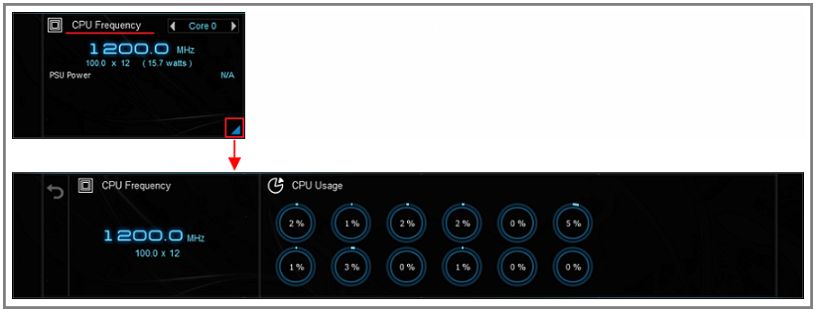 4. Нажмите синий треугольник, чтобы отслеживать разнообразие каждого напряжения. * + 12В подает напряжение на процессор, графическую карту и PCI Express. * + 5В обеспечивает напряжение для памяти, порта ввода / вывода и SSD. * + 3,3В обеспечивает напряжение для PCI Express, южного моста и локальной сети на материнской плате.
 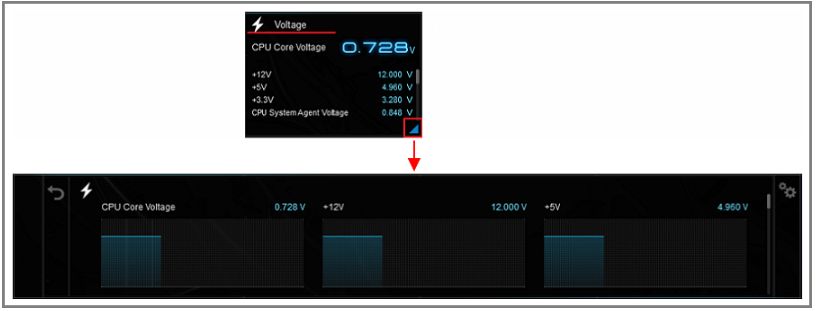 5. Нажмите синий треугольник, чтобы отслеживать различные температуры, такие как CPU, PCH, VRM, PSU и т. д.
 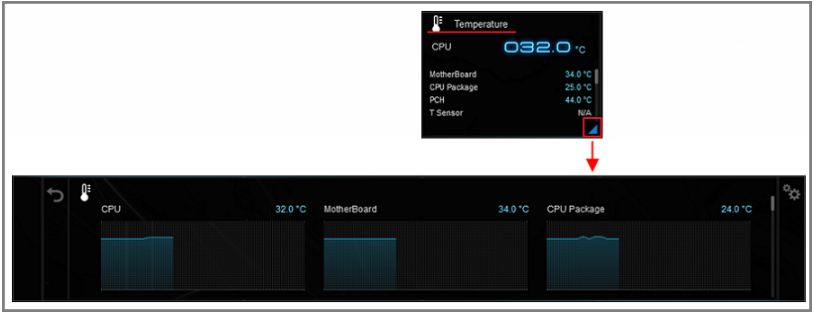 6. Нажмите синий треугольник, чтобы контролировать скорость вращения каждого вентилятора.
 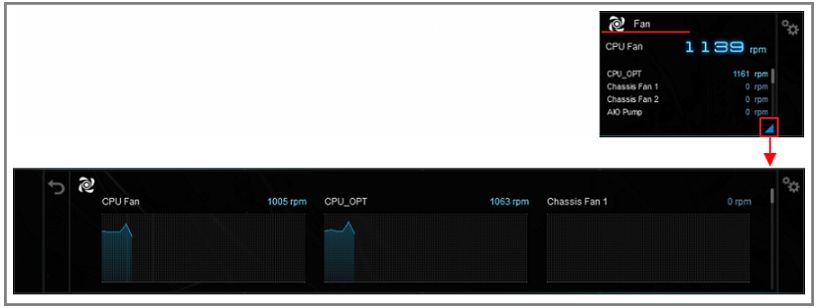 7. Щелкните значок Назад и щелкните значок списка, чтобы открыть список программного обеспечения.
 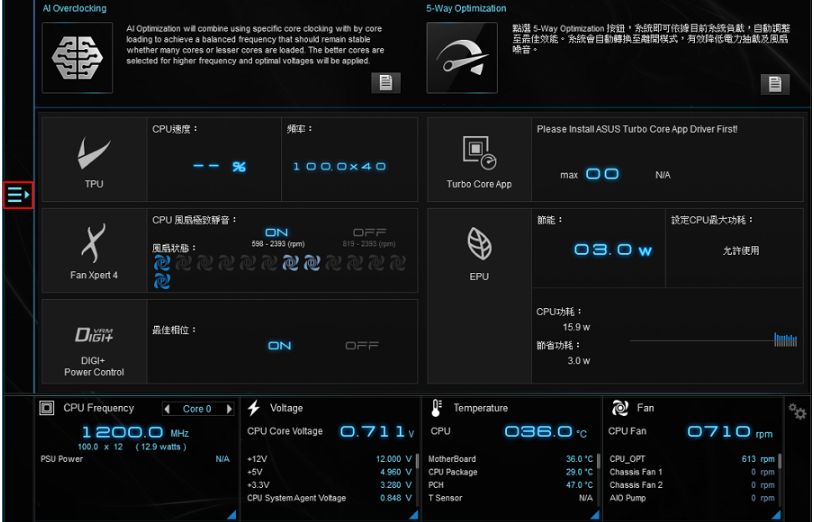 8. Нажмите, чтобы открыть программное обеспечение, список программного обеспечения может отличаться в зависимости от модели платы.
 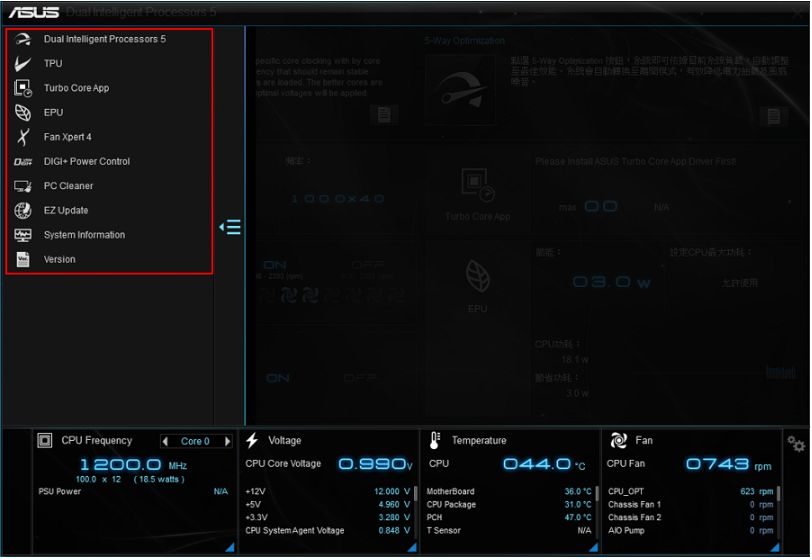 9. Для каждого программного обеспечения, пожалуйста, обратитесь к связанным темам для более подробной информации. Системная информация предоставляет информацию о MB, CPU и SPD. Версия предоставляет версию программного обеспечения в AI Suite 3 и версию системы.
  FAQ Q1: Как установить AI Suite 3? A1: Шаг1: Перейдите в Центр Загрузок Asus. Шаг2: Укажите модель вашей материнской платы.
  Шаг3: Выберите Драйверы и Утилиты
 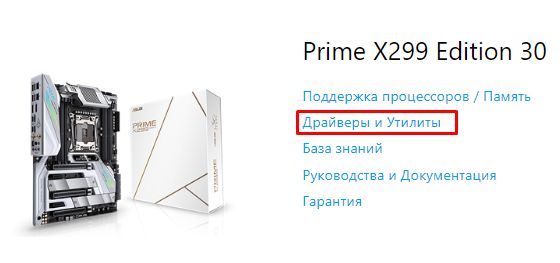 Шаг4. Укажите вашу ОС и скачайте последнюю версию AI Suite 3 из папки Utilitites
 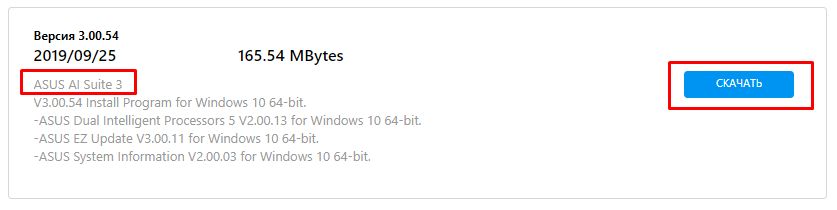 Шаг5: Извлеките файлы и откройте AsusSetup.
 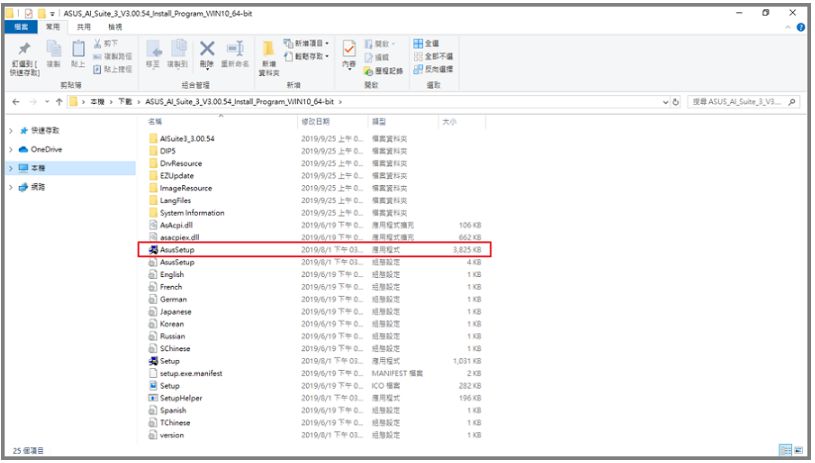 Шаг6: Выберите программу, которую вы собираетесь установить, и нажмите Установить. (Мы рекомендуем вам установить все программы для удобного мониторинга вашей системы.)
 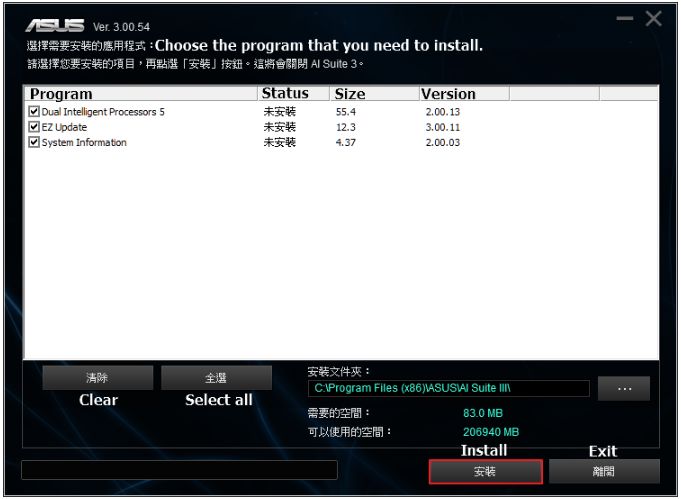 Шаг7: Нажмите OK, когда AI Suite 3 завершит установку.
 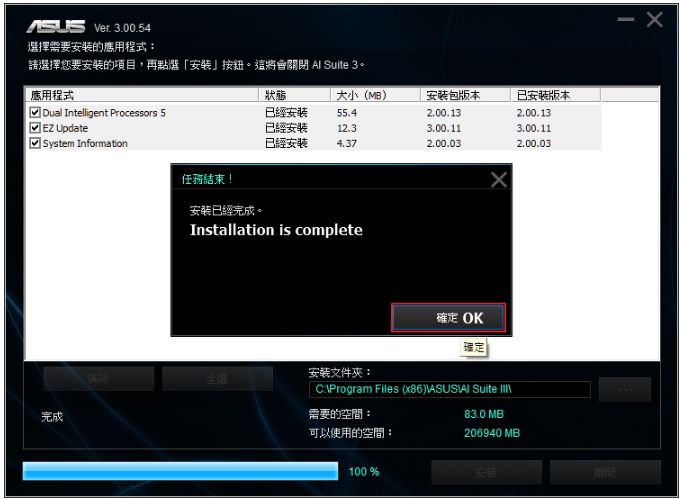 Q2: Как удалить AI Suite 3? A2: Шаг 1. Откройте настройки Windows и нажмите Приложения.
 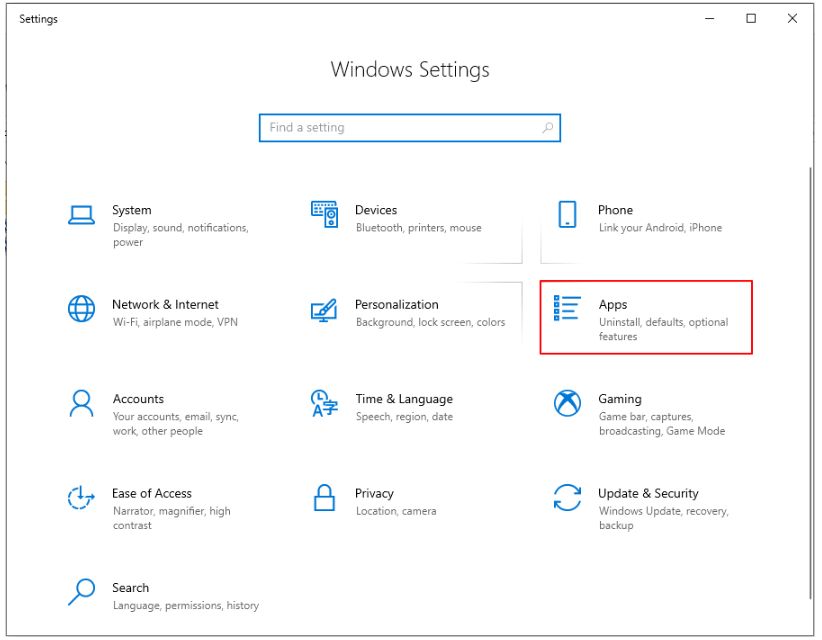 Шаг2: Выберите AI Suite 3 и нажмите Удалить
 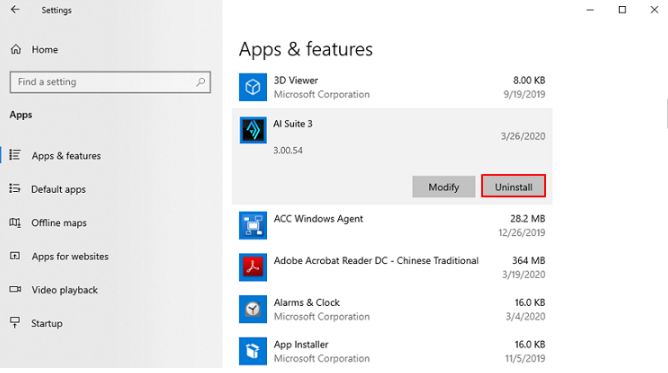 Шаг 3: выберите программу, которую вы собираетесь удалить, и нажмите Удалить.
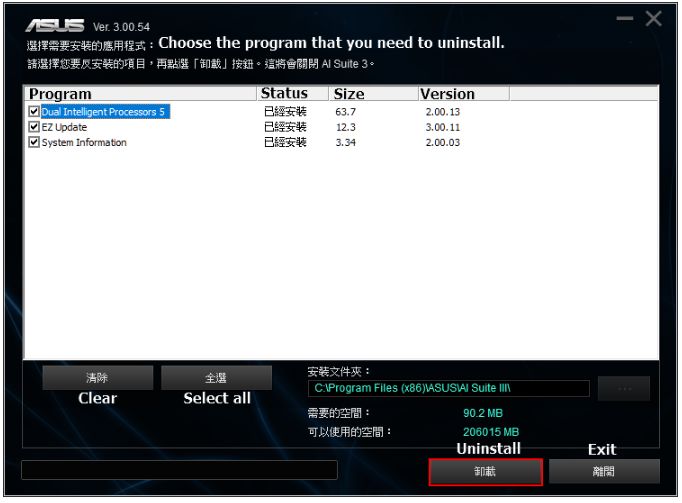
Эта информация была полезной?
Что мы можем сделать, чтобы улучшить эту статью? Отправить Пропустить
Связаться со службой поддержки
Пожалуйста, свяжитесь со службой поддержки, если информация выше не помогла решить Ваш вопрос.
Получить поддержку
- Приведенная выше информация может быть частично или полностью процитирована с внешних веб-сайтов или источников. Пожалуйста, обратитесь к информации на основе источника, который мы отметили. Пожалуйста, свяжитесь напрямую или спросите у источников, если есть какие-либо дополнительные вопросы, и обратите внимание, что ASUS не имеет отношения к данному контенту / услуге и не несет ответственности за него.
- Эта информация может не подходить для всех продуктов из той же категории / серии. Некоторые снимки экрана и операции могут отличаться от версий программного обеспечения.
- ASUS предоставляет вышеуказанную информацию только для справки. Если у вас есть какие-либо вопросы о содержании, пожалуйста, свяжитесь напрямую с поставщиком вышеуказанного продукта. Обратите внимание, что ASUS не несет ответственности за контент или услуги, предоставляемые вышеуказанным поставщиком продукта.
Продукты и информация
- Ноутбуки
- Сетевое оборудование
- Материнские платы
- Видеокарты
- Смартфоны
- Мониторы
- Показать все продукты
-
Item_other —>
- Моноблоки (All-in-One)
- Планшеты
- Коммерческое сетевое оборудование
- Серия ROG
- AIoT и промышленные решения
- Блоки питания
- Проекторы
- VivoWatch
- Настольные ПК
- Компактные ПК
- Внешние накопители и оптические приводы
- Звуковые карты
- Игровое сетевое оборудование
- Одноплатный компьютер
- Корпуса
- Компьютер-брелок
- Наушники и гарнитуры
- Охлаждение
- Chrome-устройства
- Коммерческие
-
Commercial_list.Item —>
- Моноблоки (All-in-One)
- Информационные панели
- Ноутбуки
- Настольные ПК
- Мониторы
- Серверы и рабочие станции
- Проекторы
- Компактные ПК
- Сетевое оборудование
- Материнские платы
- Игровые станции
- Data Storage
[Motherboard] AI Suite 3 — Introduction
[Motherboard] AI Suite 3 — Introduction AI Suite 3 has two functions — one is to monitor the system status, the other is to integrate ASUS software so that it is easy to access the ASUS software through AI Suite 3. To provide you more detailed instruction, you can also click ASUS Youtube video link below to know more about AI Suite 3 https://www.youtube.com/watch?v=MVS2Bx8Uofg How to use AI Suite 3 1. Click Windows icon, and click AI Suite 3 to open it. 2. User can monitor CPU frequency, Voltage, Temperature, Fan through AI Suite 3. *Example below: PRIME X299 EDITION 30 3. Click the blue triangle to check CPU frequency and CPU usage. *CPU frequency affects CPU efficiency. *CPU usage means the CPU is used in a period of time. The following figure shows the CPU usage of 6-cores 12-threads. 4. Click the blue triangle to monitor each voltage range. *+12V provides voltage to CPU, graphic card and PCI express. *+5V provides voltage to memory, Input / Output port and SSD. *+3.3V provides voltage to PCI express, south bridge and LAN on motherboard. 5. Click the blue triangle to monitor temperature ranges, such as CPU, PCH, VRM, PSU, etc. 6. Click the blue triangle to monitor the rotating speed of each fan. 7. Click the back icon , and click the list icon to open the software list. 8. Click to open the software. Software list may differ from motherboard to motherboard. 9. For each software, please refer to the related topics for more details. System information provides the information of MB, CPU and SPD. Version provides software version in AI Suite 3 and system version. FAQ Q1: How to install AI Suite 3? A1: Step 1: Go to ASUS download center. https://www.asus.com/support/Download-Center/ Step 2: Enter your model name. Step 3: Click Driver & Utility. Step 4: Choose your Operating system and download the latest AI Suite 3 from Utility. Step 5: Extract the files and open AsusSetup. Step 6: Click the program you want to install, then click Install. (We recommend to install all programs that will help monitor your system more easily) Step 7: Click OK when AI Suite 3 has finished the installation. Q2: How to uninstall AI Suite 3? A2: Step 1: Open Windows settings, and click Apps. Step 2: Choose AI Suite 3, and click Uninstall. Step 3: Choose the program that you are going to uninstall and click Uninstall.
Was this information helpful?
What we can do to improve the article? Submit Skip
Contact Support
If you need more help, see our solutions to get support.
See support
- Above information might be partly or entirely quoted from exterior websites or sources. please refer to the information based on the source that we noted. Please directly contact or inquire the sources if there is any further question and note that ASUS is neither relevant nor responsible for its content/service
- This information may not suitable for all the products from the same category/series. Some of the screen shots and operations could be different from the software versions.
- ASUS provides the above information for reference only. If you have any questions about the content, please contact the above product vendor directly. Please note that ASUS is not responsible for the content or service provided by the above product vendor.
- Brand and product names mentioned are trademarks of their respective companies.
- Laptops
- Motherboards
- Phone
- Tower PCs
- Networking
- Monitors
- Show All Products
-
Item_other —>
- Graphics Cards
- ROG — Republic Of Gamers
- Gaming handhelds
- AIOT & Industrial Solutions
- Power Supply Unit
- Business Networking
- Projectors
- Tablets
- Mini PCs
- Health & Fitness
- Optical Drives & Storage
- Stick PCs
- Sound Cards
- Gaming Networking
- Single-board Computer
- Chassis
- Chrome Devices
- All-in-One PCs
- Cooling
- Headphones & Headsets
- Headphones & Headsets
- Commercial
-
Commercial_list.Item —>
- Tablets
- Laptops
- Desktop
- Monitors
- Server & Workstation
- Projectors
- Motherboard
- Networking
- Mini PCs
- Data Storage
- All-in-One PCs
- Signage
- Gaming Station
- Warranty check
- Check repair status
- Find Service Locations
- Product Registration
- ASUS Support Videos
При подготовке материала использовались источники:
https://www.asus.com/support/FAQ/1012780/
https://www.asus.com/ru/support/FAQ/1012780/
https://www.asus.com/me-en/support/FAQ/1012780/