Что за программа и для чего ардуино
Arduino
Please follow our step-by-step download and installation instructions for the Arduino IDE.
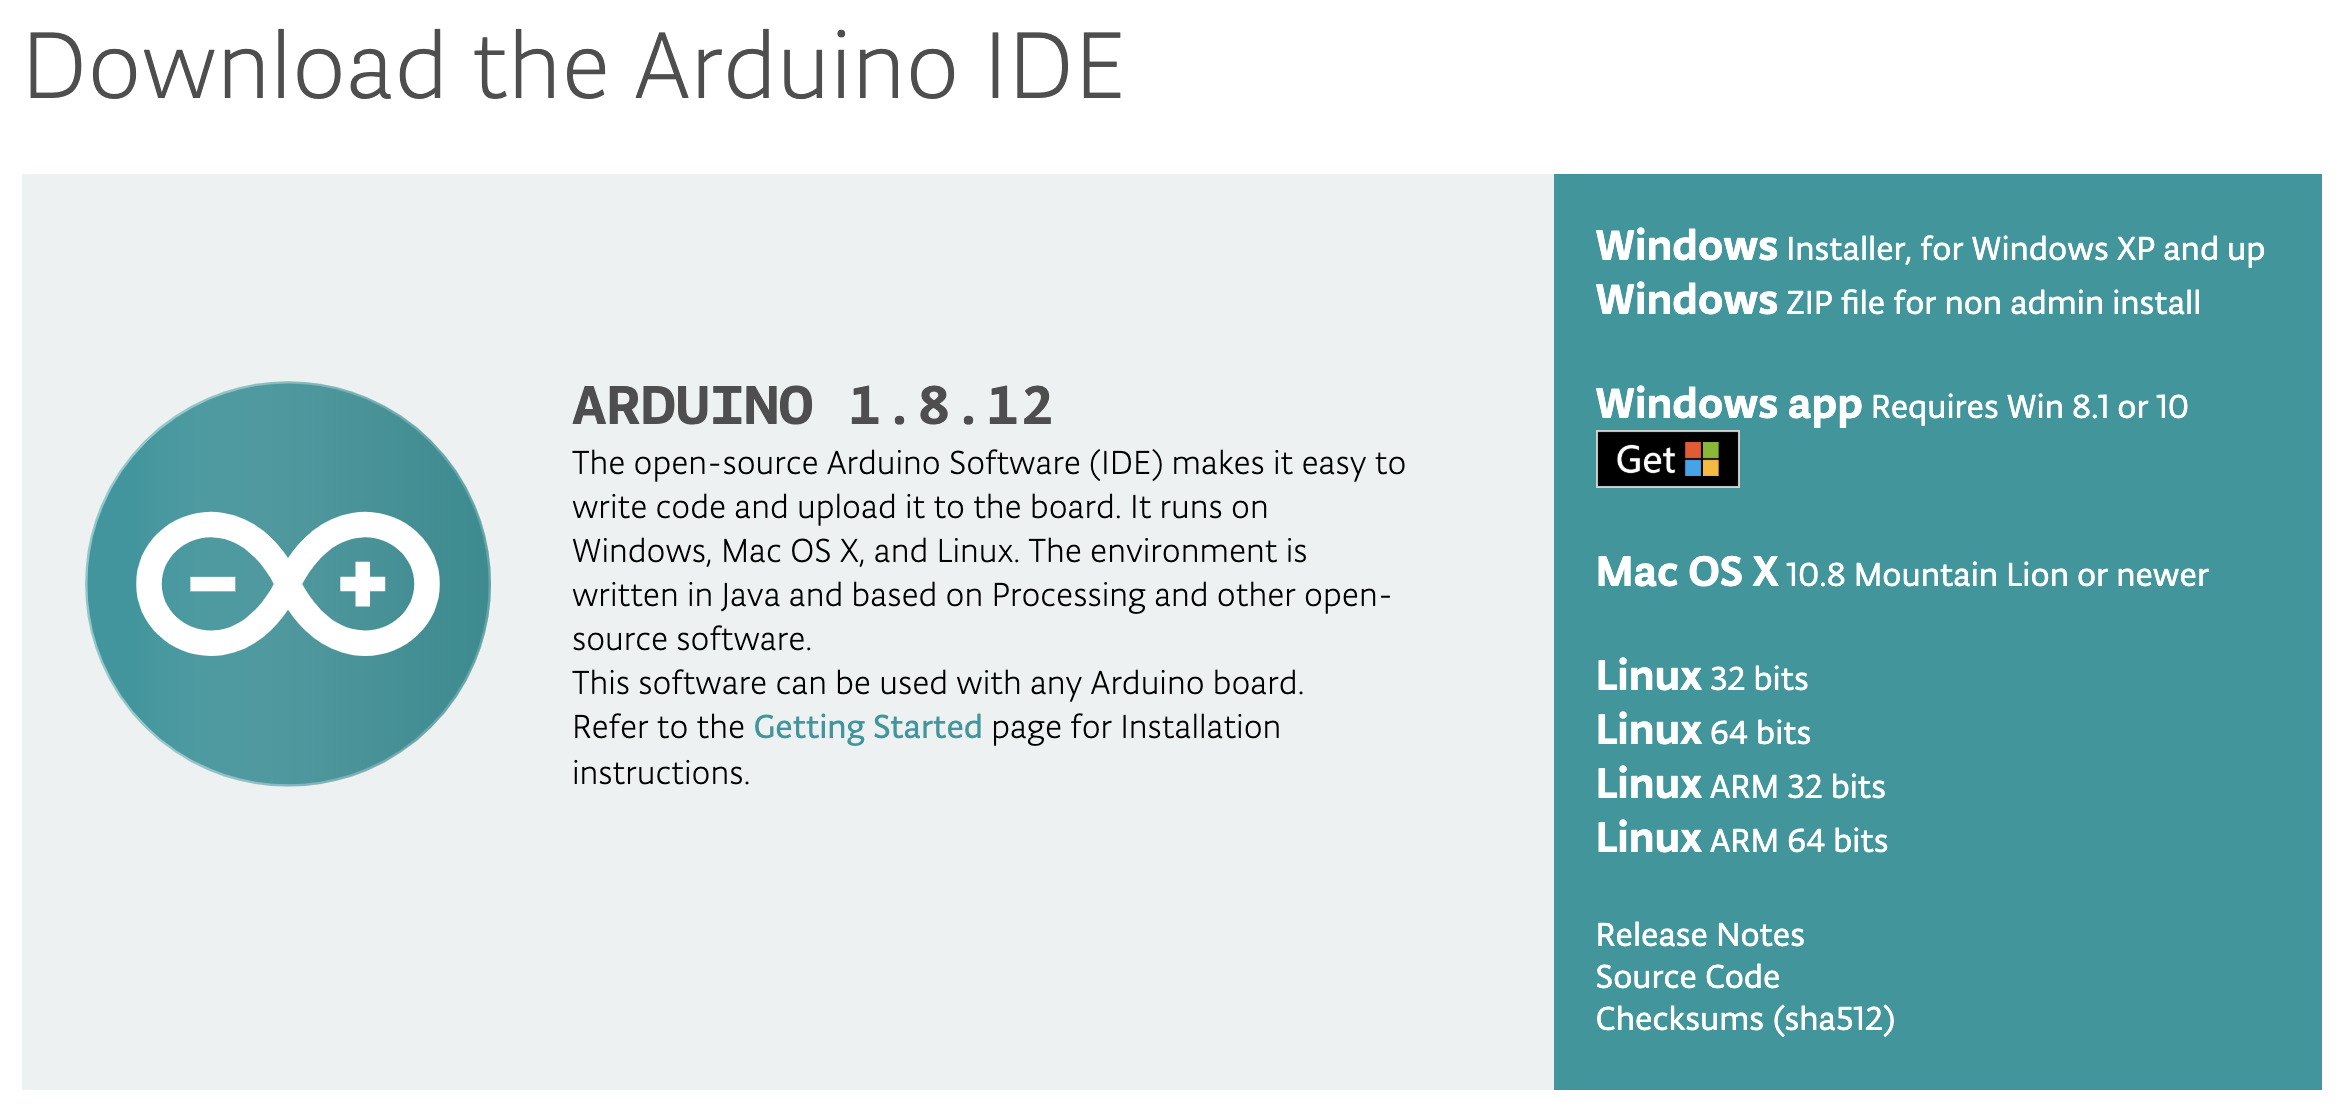
Step 1: Download and install the Arduino IDE
Download and install the local Mac, Windows, or Linux version of the Arduino IDE. We will not be using the Cloud version (the “Arduino Web Editor”), so please download and install the version that runs locally on your machine.
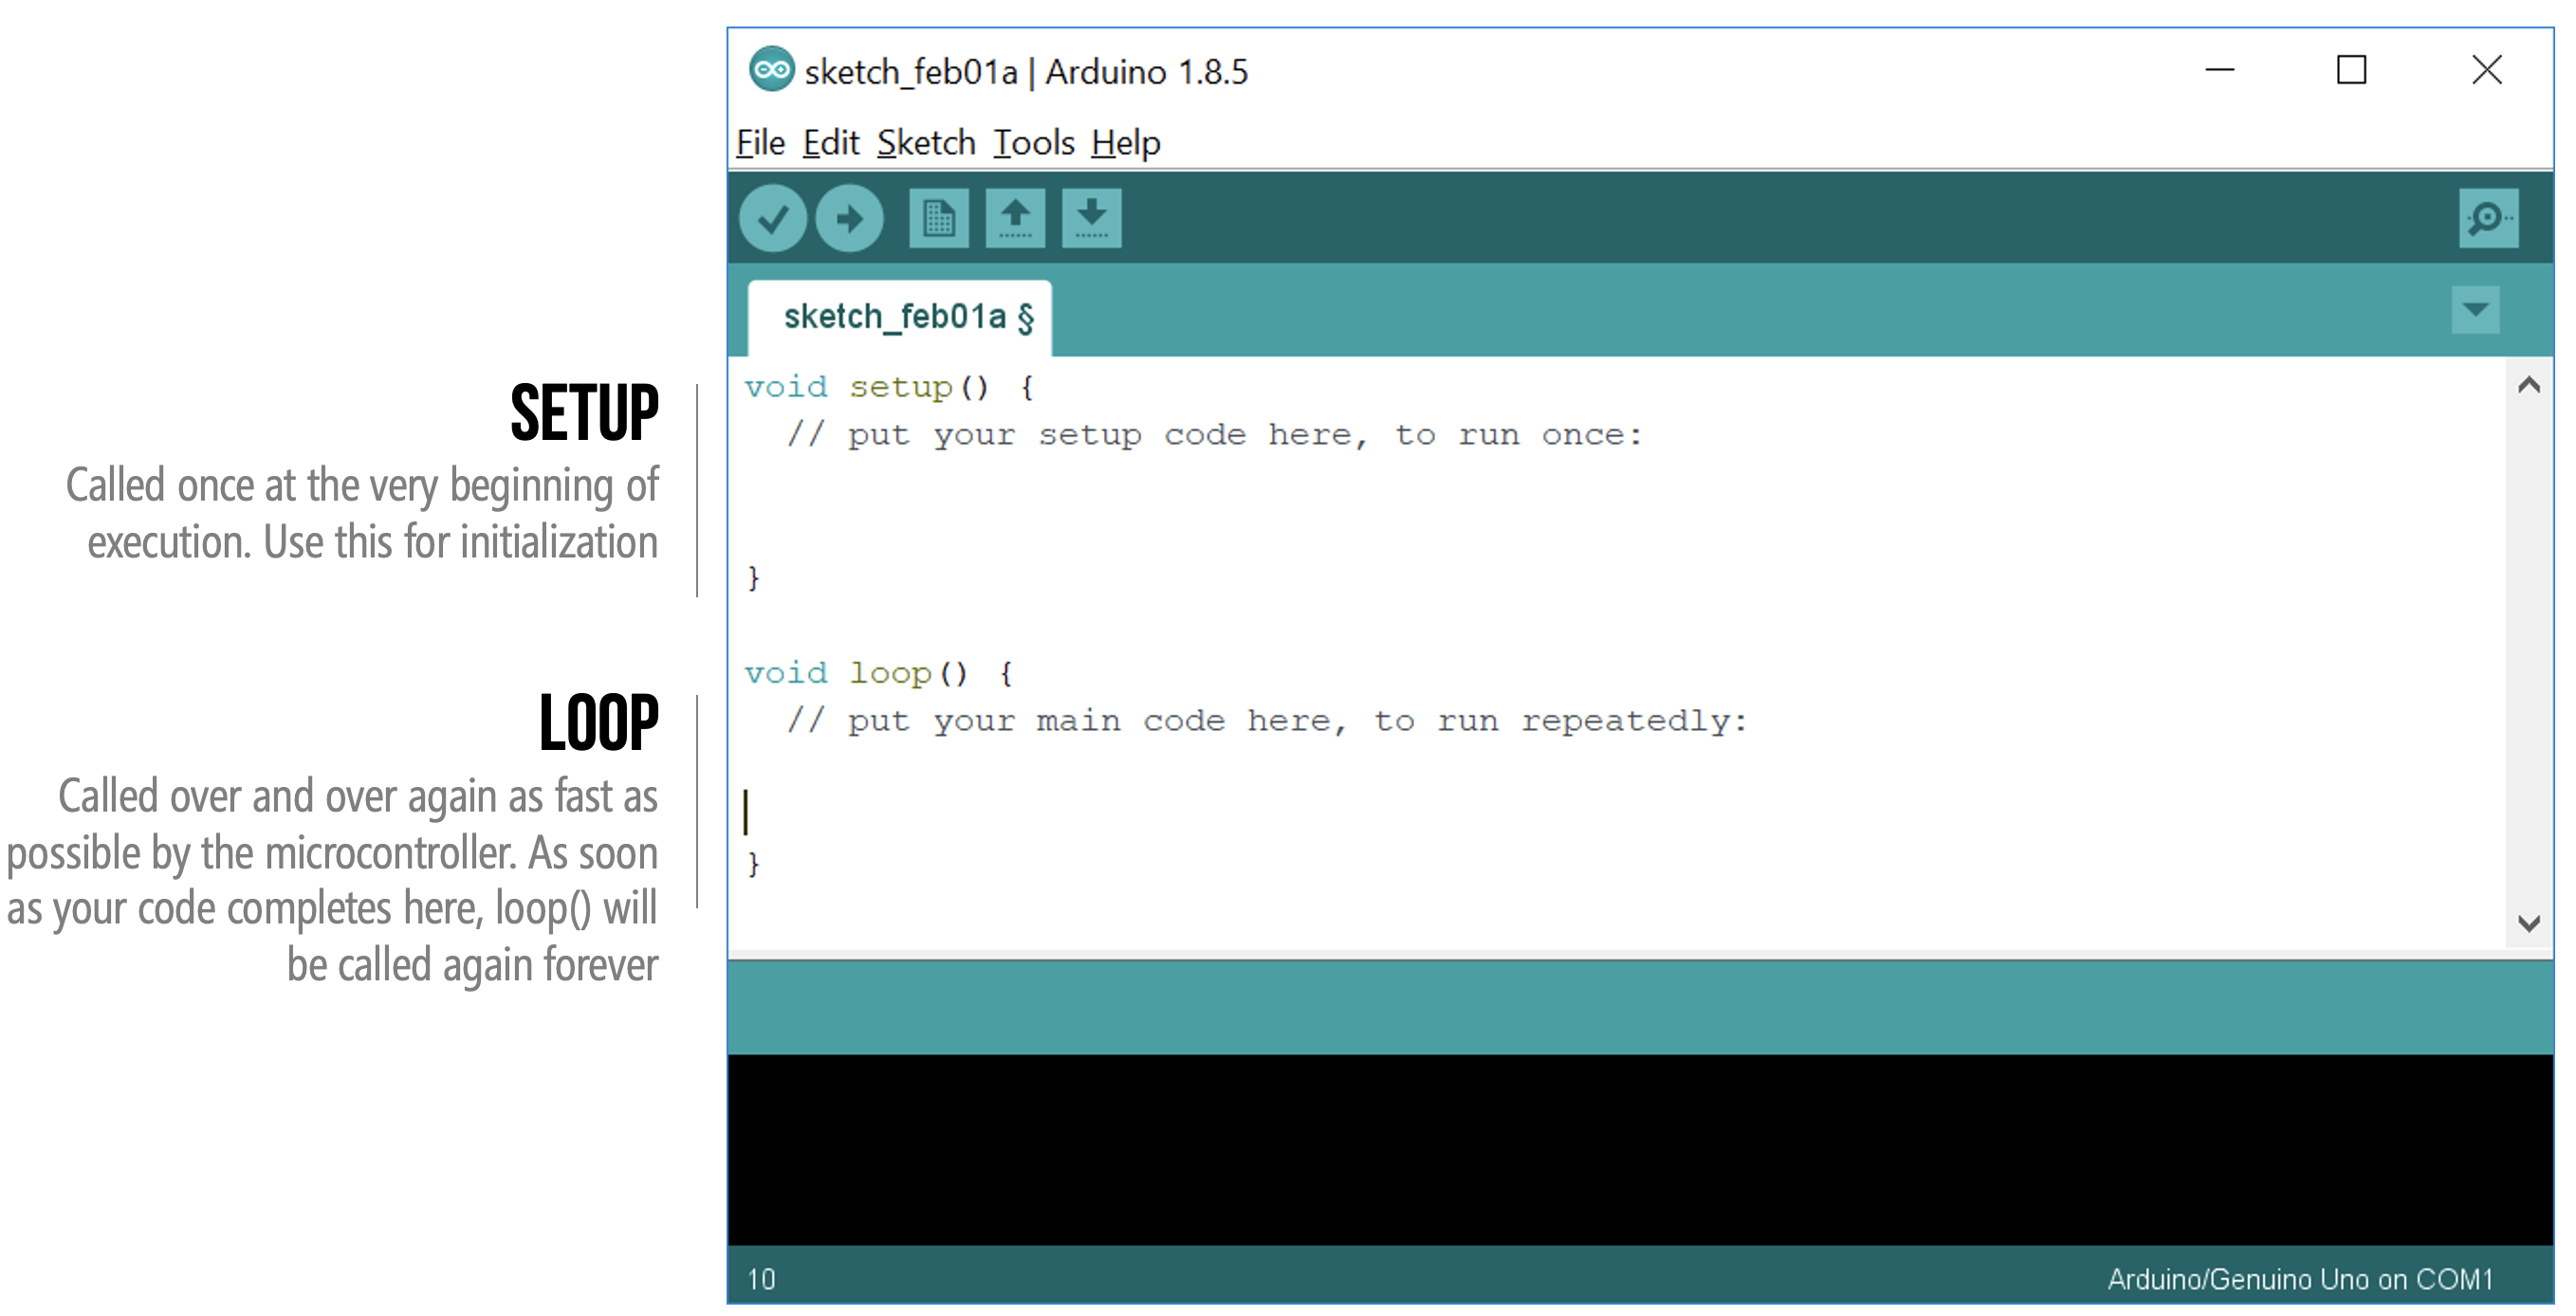
Step 2: Open the IDE
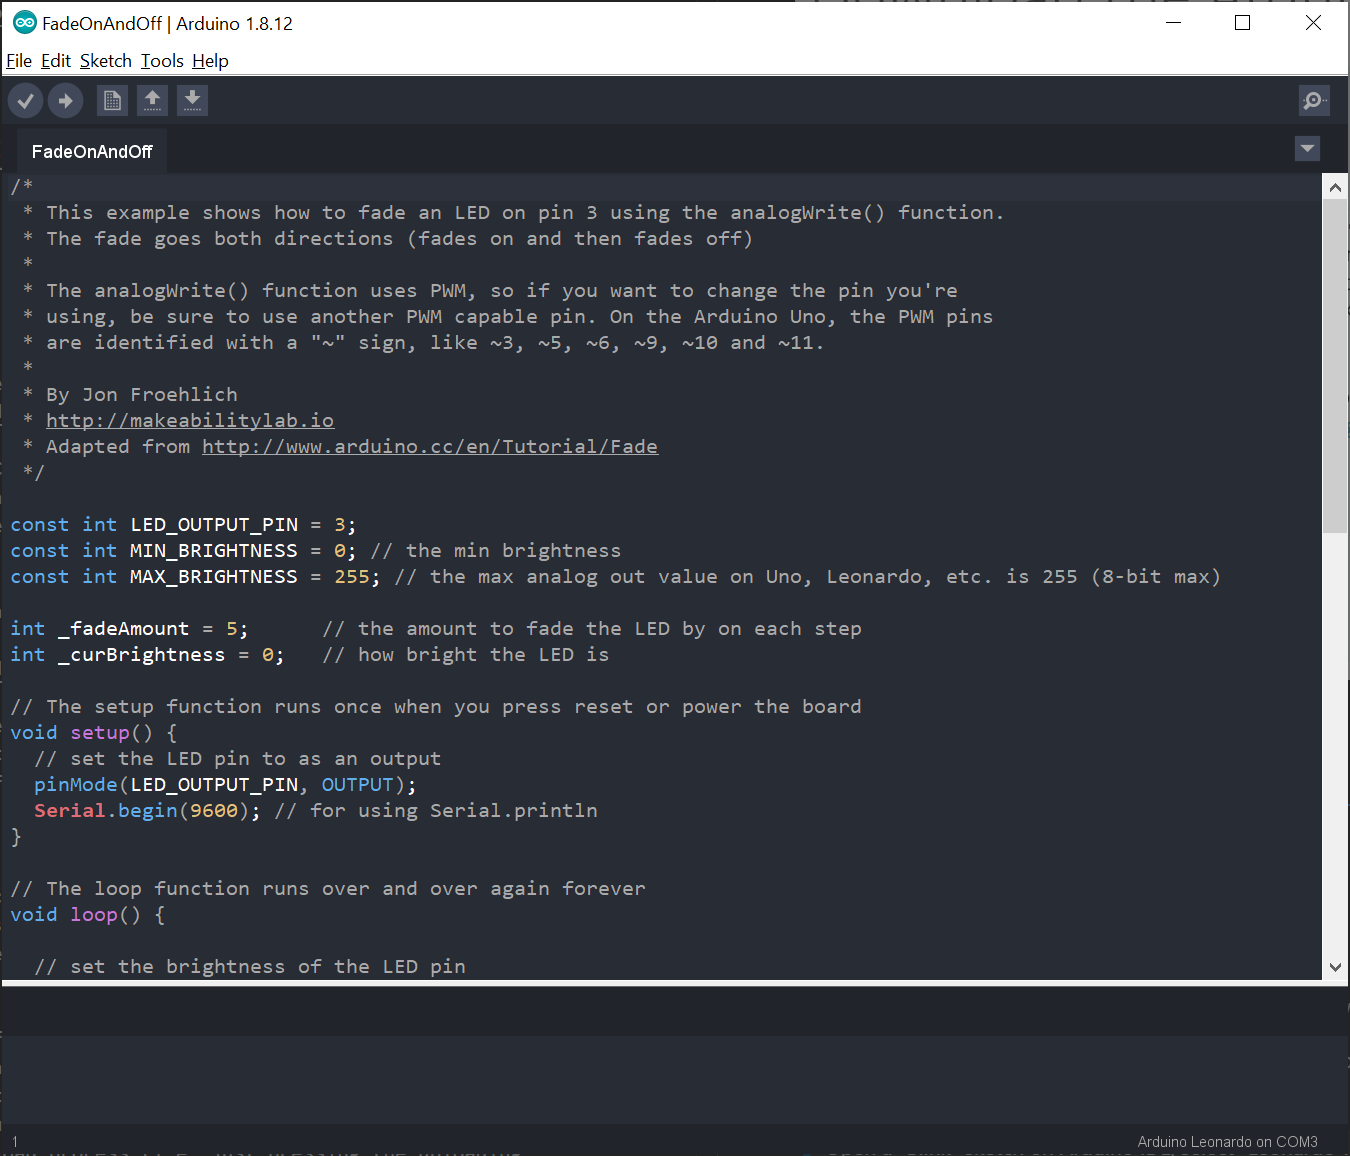
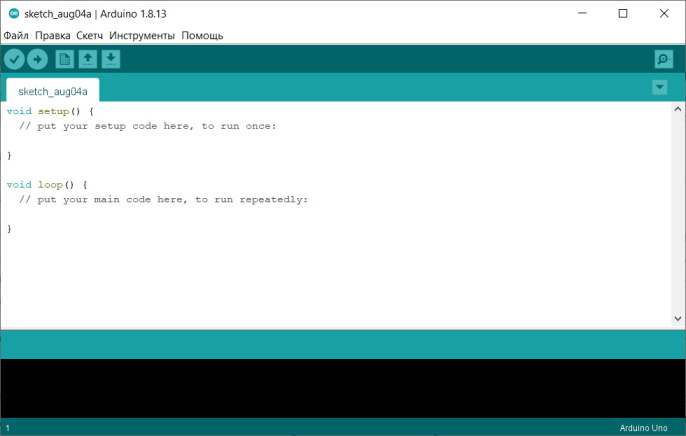
After installation is complete, open the Arduino IDE. Notice that there are two blocks of code (called functions):
- The first block is setup() , which is called once and only once when the Arduino is turned on
- And the second block is loop() , which is called as soon as setup() completes. When loop() completes, it’s automatically called again and again (until the Arduino is turned off). Want to learn more, read Inside Arduino.
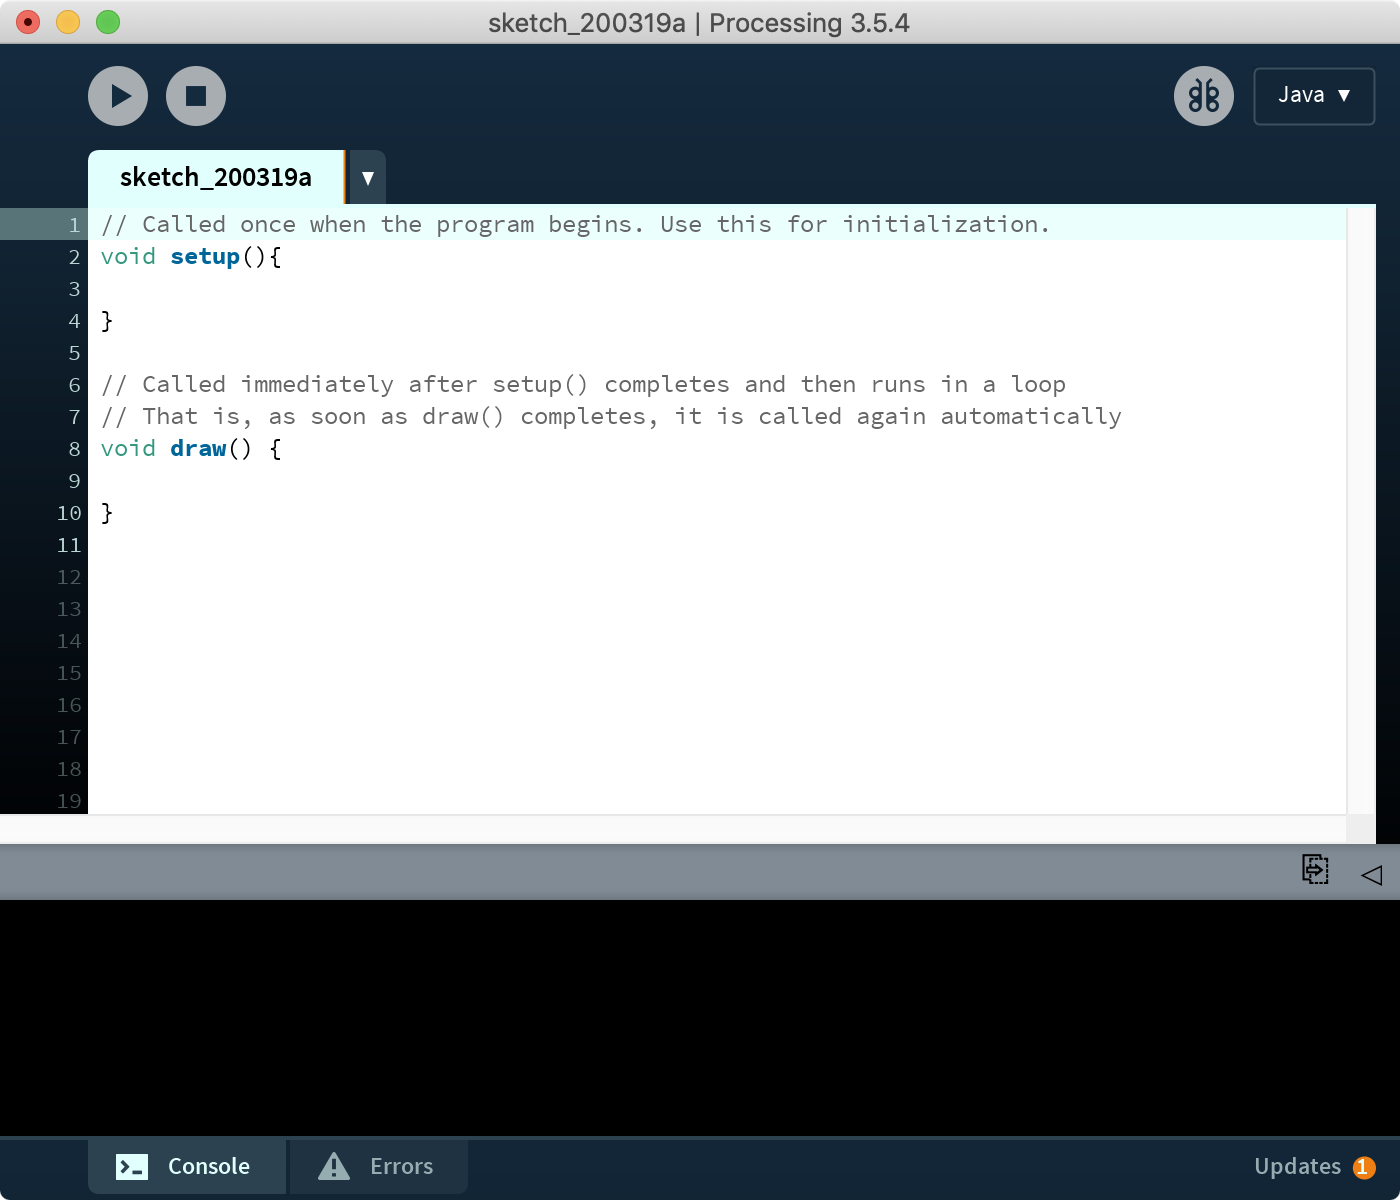
For those who have used Processing—a programming environment for digital artists and creators (and a favorite of mine)—this code structure should seem familiar. Indeed, the Arduino IDE is written in Java and derives from Processing (link).
| Processing |
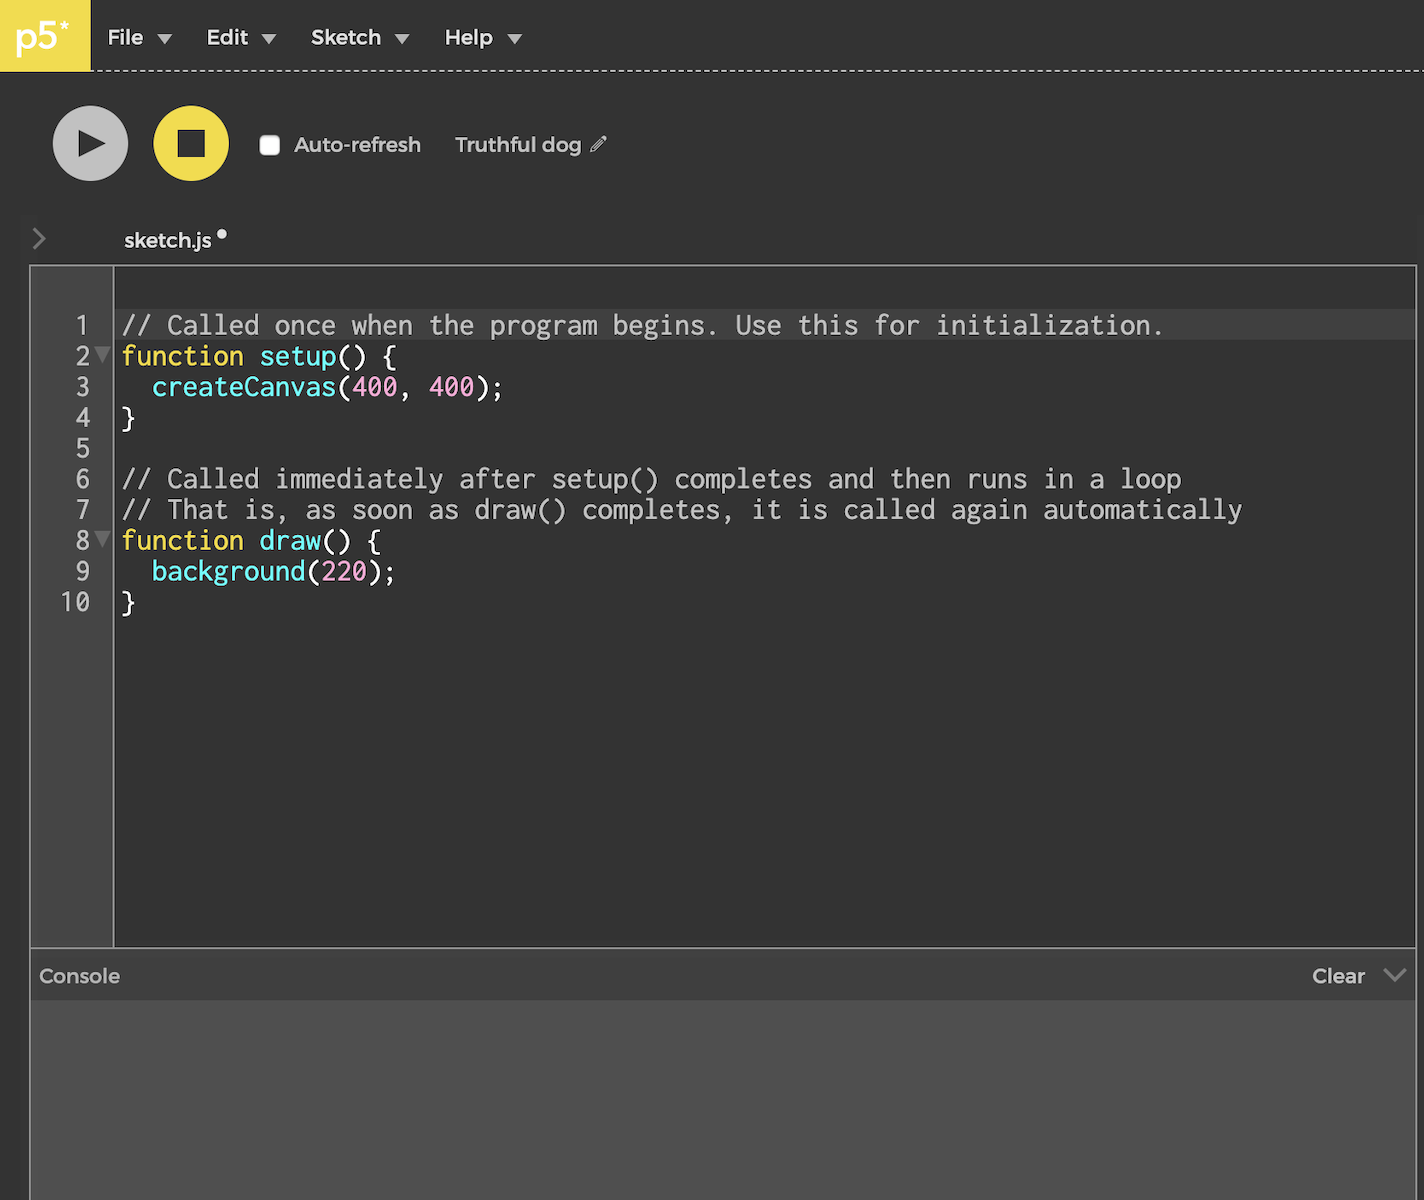
p5js |
 |
 |
| A screenshot of the Processing IDE |
A screenshot of the p5.js IDE |
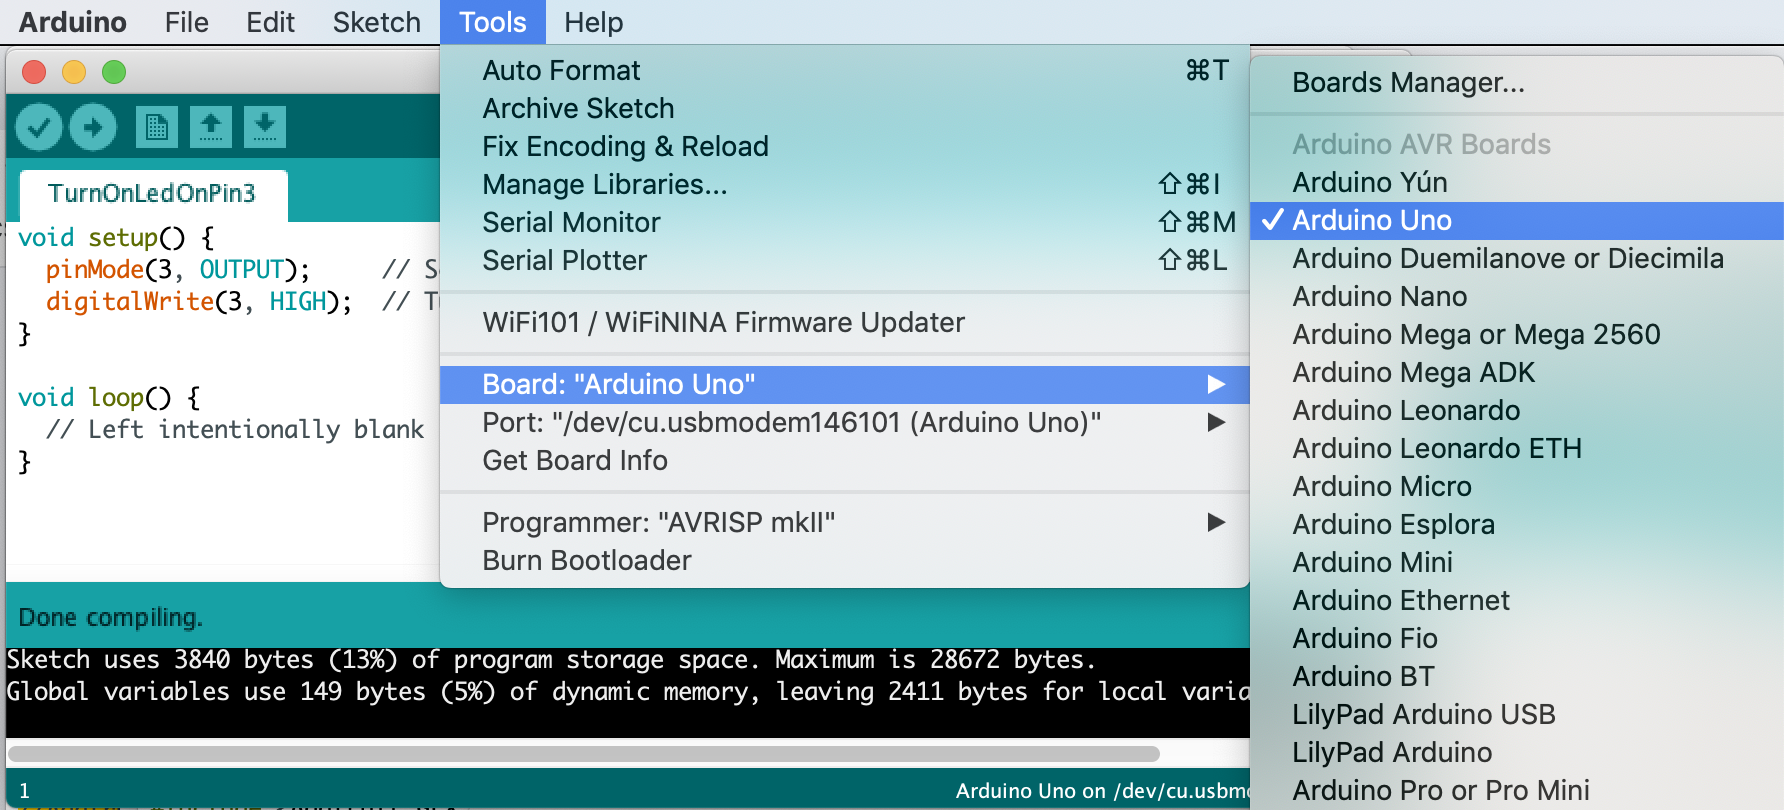
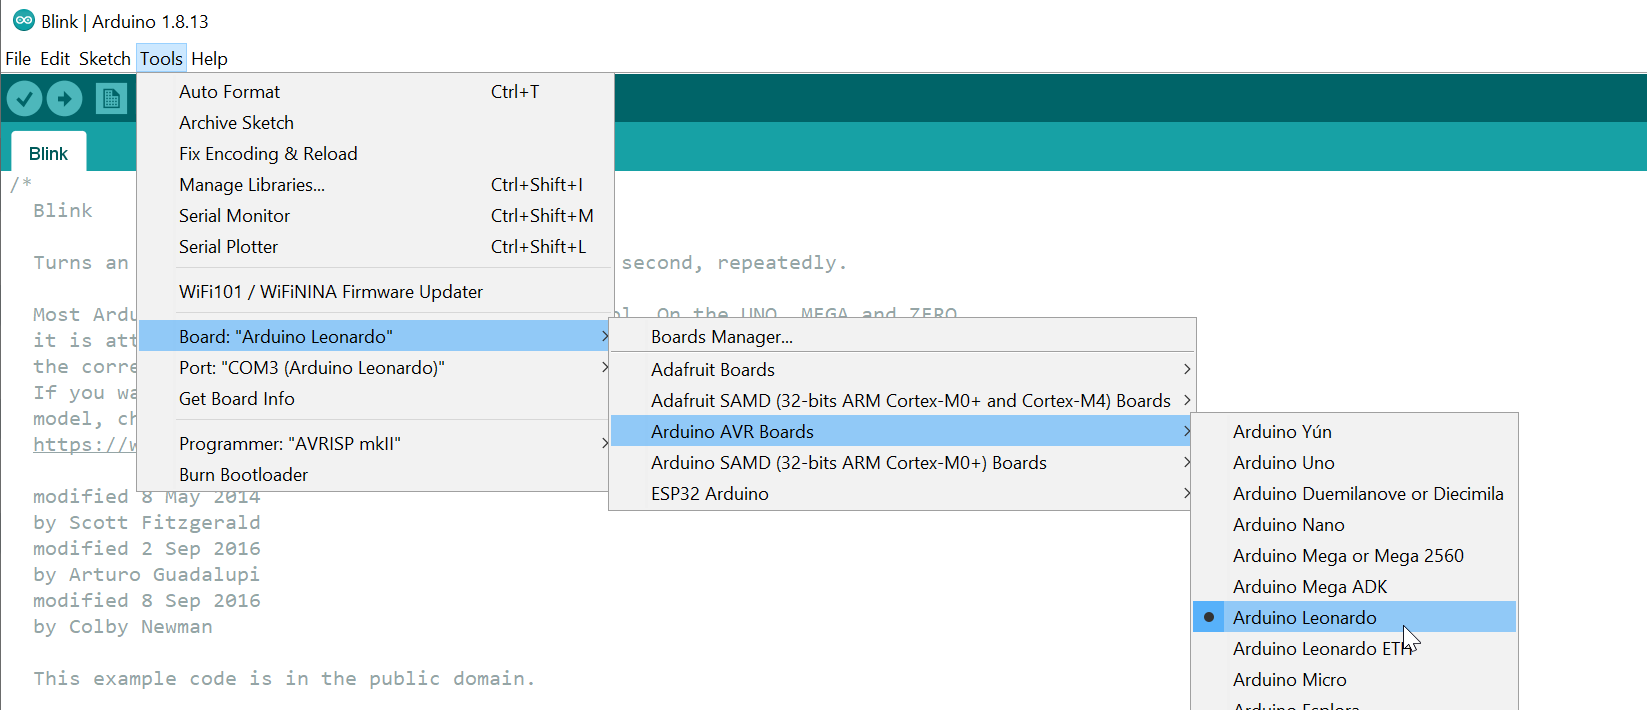
Step 3: Select your Arduino board
Plug in your Arduino and select your Arduino board in the Tools menu:
Stop and double check the following
A significant number of frustrating hours are wasted because:
- The incorrect Arduino board was selected. Double check this. For example, there are two Arduino Leonardo options: “Arduino Leonardo” and “Arduino Leonardo ETH”. You must select the regular “Arduino Leonardo” board.
- The incorrect port was selected. Sometimes, your port selection gets reset. Other times, your Arduino gets moved to a different port. If you get a “uploading error”, check this first!
- Finally, using a non-data enabled USB cable. You must use a USB cable that provides data not just one that provides power. Sometimes, cheap USB cords—which are largely sold to charge mobile phones—save on costs by not including and connecting the data wire in the USB spec.
Install custom theme
To use a dark theme in the Arduino IDE, follow these steps. Note: I started investigating this when I noticed that the default Arduino theme was difficult to read over Zoom.
Troubleshooting
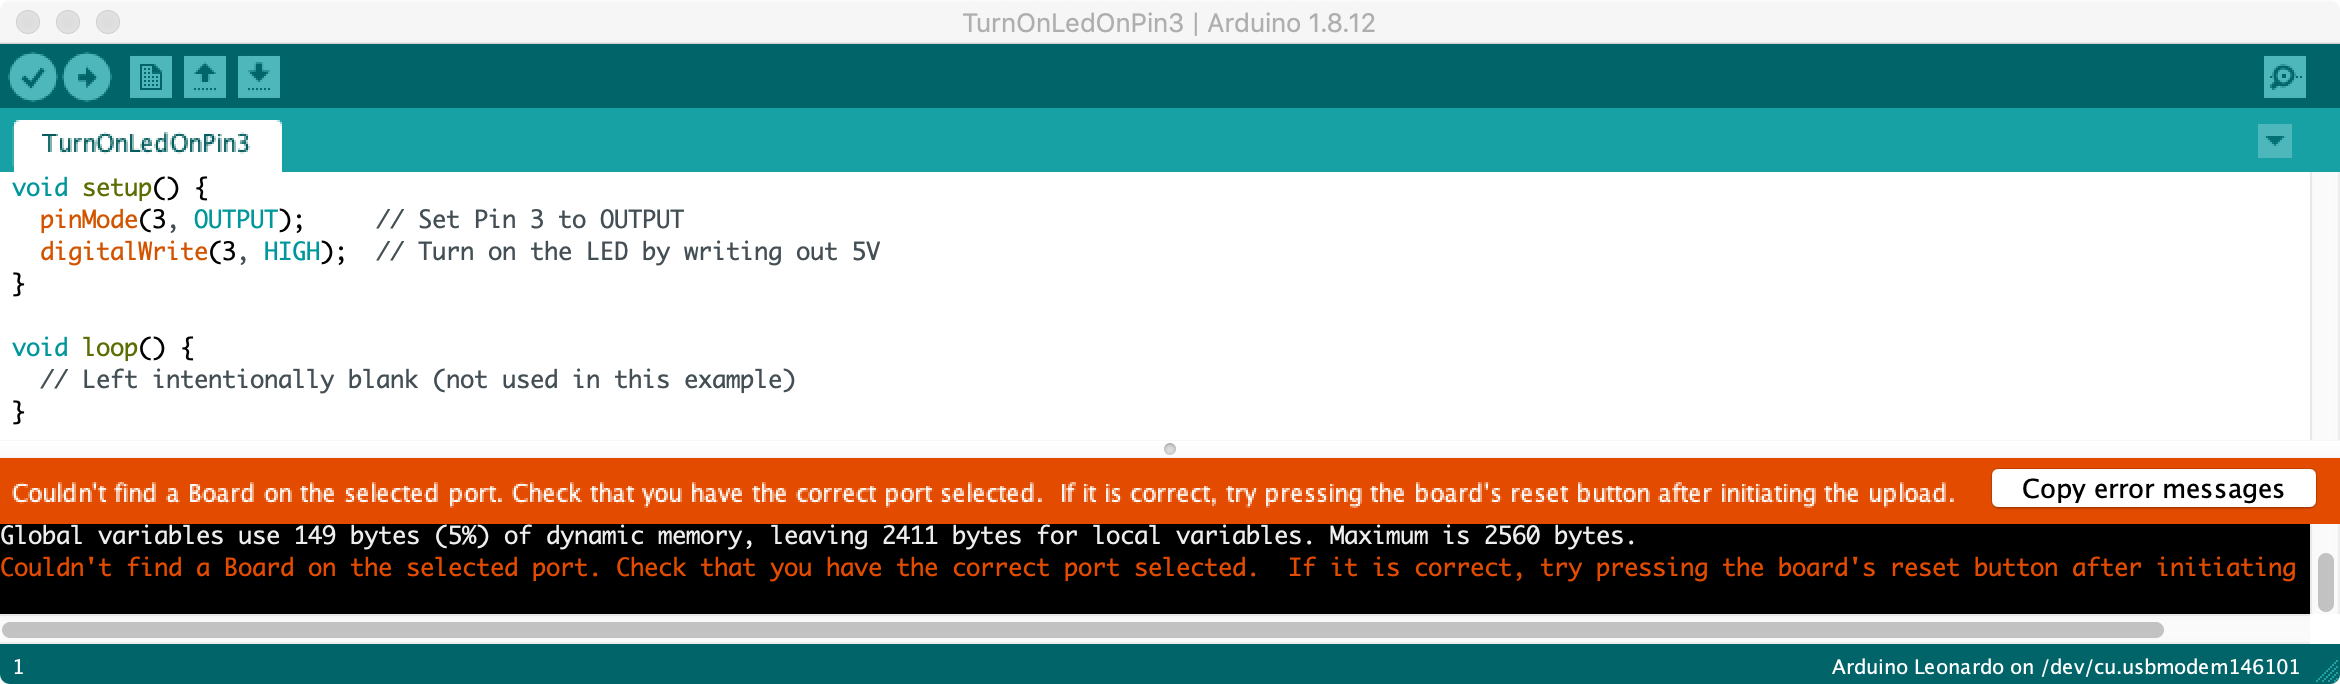
Couldn’t find a Board on the selected port
If you click the upload button but receive the following error, did you remember to set the correct Arduino board and port in Tools->Board and Tools->Port ? See above.
Arduino Leonardo port doesn’t show up in Tools->Port
First, check to ensure that your USB cable provides both power + data. Some cheaper cables are power only.
Second, I’ve found (frustratingly) that sometimes the com software on the Leonardo can get confused. The only way I’ve figured out how to solve it is by following these directions. In short:
Open a “Blink” sketch on Arduino IDE, select “Leonardo”. Now there is no COM port. Press “RESET” and select the COM port in the Arduino IDE immediately. Wait a minute, the COM port will disappear again. Now, click “Upload”. After IDE has completed verifying, press “RESET” on the Leonardo (physical button). If everything is OK, the COM port has been fixed after uploading.
Fortunately, if this solution works, the Leonardo will be ‘fixed’ and you can upload normally again.
Why does this happen? Read the official Arduino guide here:
In general, you upload code to the Leonardo or Micro as you would with the Uno or other Arduino boards. Click the upload button in the Arduino IDE and your sketch will be automatically uploaded onto the board and then started. This works more or less the same way as with the Uno: the Arduino software initiates a reset of the board, launching the bootloader — which is responsible for receiving, storing, and starting the new sketch.
However, because the serial port is virtual, it disappears when the board resets, the Arduino software uses a different strategy for timing the upload than with the Uno and other boards. In particular, after initiating the auto-reset of the Leonardo, Leonardo ETH or Micro (using the serial port selected in the Tools > Serial Port menu), the Arduino software waits for a new virtual (CDC) serial / COM port to appear — one that it assumes represents the bootloader. It then performs the upload on this newly-appeared port.
These differences affect the way you use the physical reset button to perform an upload if the auto-reset isn’t working. Press and hold the reset button on the Leonardo or Micro, then hit the upload button in the Arduino software. Only release the reset button after you see the message “Uploading…” appear in the software’s status bar. When you do so, the bootloader will start, creating a new virtual (CDC) serial port on the computer. The software will see that port appear and perform the upload using it. Again, this is only necessary if the normal upload process (i.e. just pressing the uploading button) doesn’t work. (Note that the auto-reset is initiated when the computer opens the serial port at 1200 baud and then closes it; this won’t work if something interferes with the board’s USB communication — e.g. disabling interrupts.)
Arduino is open source
Arduino is open source and hosted on GitHub.
This website was developed by Professor Jon E. Froehlich and the Makeability Lab using Just the Docs. If you found the website useful or use it in your teaching, we’d love to hear from you: jonf@cs.uw.edu. This website and all code is open source (website GitHub, Arduino GitHub, p5js GitHub). You can find the MakeabilityLab_Arduino_Library here. Found an error? File a GitHub Issue.
Arduino IDE

Arduino IDE — это интегрированная среда разработки для Windows, MacOS и Linux, разработанная на Си и C++, предназначенная для создания и загрузки программ на Arduino-совместимые платы, а также на платы других производителей.
Простая и функциональная среда разработки для создания создания собственного ПО, которым управляются многочисленные устройства, собранные начинающими и опытными электронщиками. Соединение ПК с микроконтроллером реализовано через интерфейс USB. Код на языке Си и C++ пишется в редакторе, в котором есть подсветка команд и спеллчекер.
Среда разработки программного обеспечения (IDE) для конструктов на основе плат Arduino появилась одновременно с аппаратной частью популярной платформы. Это логично, ведь концепция, при которой инженеру не приходится работать с программатором, подразумевает, что инструкции должны быть легко прошиты в микроконтроллер.
Низкий порог вхождения в конструирование собственных электронных устройств достигается за счет простоты написания программной части. В каждый микроконтроллер вшит загрузчик ПО, который трансформирует инструкции, написанные человеком, в машинные коды без использования аппаратного программатора. Начинающие разработчики и опытные инженеры-электронщики ценят легкость, с которой создается работающий прототип или готовое устройство. Для работы с аппаратурой необходим только компьютер с установленной средой разработки, которая свободно распространяется.
В октябре 2019 года организация Arduino начала предоставлять ранний доступ к новой Arduino Pro IDE с отладкой и другими расширенными функциями.
Скачать Arduino IDE 1.8.16
Скачать для Windows:
- Инсталлятор для Windows — Windows XP, Windows 7, Windows 8, Windows 10 и выше.
- Архив ZIP для Windows — установка без прав админа, портативная версия для флешки.
- Приложение — для Windows 8.1/10 в Microsoft Store.
Скачать для Mac OS X:
- Инсталлятор для Mac OS X — Mac OS X 10.10 и новее.
Скачать для Linux:
- Linux 32 bits
- Linux 64 bits
- Linux ARM 32 bits
- Linux ARM 64 bits
Arduino IDE для Windows Установка Arduino IDE на Mac OS Установка Arduino IDE на Linux
Печатные платы управления, которые составляют основу любого устройства, различают прежде всего по типу микроконтроллера. Начальные версии идут с чипами ATmega328:
С оговоркой в список попадает и LilyPad с контроллером ATmega328p. Общими у этих плат будут объемы ОЗУ и Flash – 2 и 32 КБ соответственно. Различия заключаются в количестве выходов, аналоговых и цифровых. Это основные платы Arduino, на которых строится множество устройств.
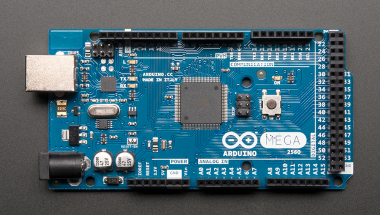
Кроме них есть еще и платы Leonardo и Micro с чипом ATmega32u4, а также Mega c чипом от того же производителя Atmel, но его цифры – 2560.
Интегрированная среда разработки для управляющего кода называется Arduino IDE. Включает в себя редактор, препроцессор и компилятор. Может быть дополнена подключаемыми библиотеками с самым разным функционалом. Готовый код заливается непосредственно в устройство, но может быть сохранен и в качестве отдельного файла с расширением «*.ino».
Программный код для реализации тех или иных аппаратных функций в среде Arduino называют скетчем. Обязательное условие для корректного выполнения программы на физическом устройстве – наличие двух частей.
- void setup(), в которой описывается окружение, в котором будет выполнена программа (переменные, PIN`ы платы, библиотеки и т.д.)
- void loop(), бесконечный цикл, который выполняется до тех пор, пока оборудование не будет выключено
Arduino IDE включает в себя не только редактор, но еще и компилятор, работающий в паре с загрузчиком. Для ознакомления с возможностями предусмотрены готовые шаблоны кода, которые сразу загружаются в устройство. Новичкам обычно демонстрируют мигание светодиода с заданной периодичностью. Шаблон этого кода можно загрузить в редактор через меню «Файл», в котором есть отдельный пункт «Примеры» или, в зависимости от версии, «Образцы».
Среда разработки распространяется свободно. Инсталляторы Arduino IDE можно скачать c нашего сайта для операционных систем Windows, Mac OS, Linux. В качестве компилятора среда использует небезызвестный avr-gcc, а значит, что «из коробки» пользователь получает поддержку оригинальных плат с архитектурой AVR и аналогов.
Интерфейс у IDE для Arduino предельно лаконичен: меню и функциональные кнопки – сверху, редактор – в центре, лог работы компилятора и загрузчика – внизу. В рабочей области открываются вкладки, но они в данном случае имеют особый смысл. Во-первых, не являются отдельными проектами: они разбивают код инструкции, который находится в одной папке, на смысловые части. Во-вторых, читаются и, главное, компилируется слева направо. И в-третьих, располагаются в алфавитном порядке.
Локализация Arduino IDE на русском выбирается после установки. Нативный для пользователя язык меню подключается стандартным способом, через настройки.
Среда разработки не предназначена для ведения сложных проектов с древовидной структурой файлов, но она по-прежнему остается популярной, так как работа с аппаратной частью не предполагает ветвлений. Оболочка IDE написана на Java и весьма тяжеловесна при запуске и компиляции кода, но главную задачу выполняет. Отправить код в микроконтроллер при помощи среды разработки можно легко и быстро.
Платы Arduino
Калугин Антон 28-07-2020, 16:53
Arduino Mega 2560 — это обновленная версия платы Мега. Она компактна, функциональна, легко настраивается, имеет ряд преимуществ перед своими аналогами. Обо всем этом говорим сегодня в нашей.
Калугин Антон 28-07-2020, 16:53
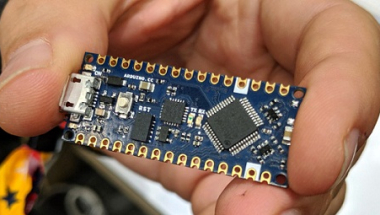
Arduino Nano является чуть ли не самой популярной отладочной платформой в линейке продуктов Ардуино. И это не удивительно, ведь эта плата имеет ряд достоинств, при этом она доступна по стоимости, да.
Калугин Антон 28-07-2020, 16:53
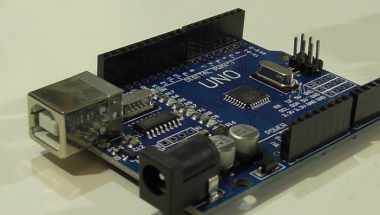
Arduino Uno – самая популярная плата в семействе Ардуино. Ее активно приобретают и используют во многих современных проектах, она проста в сборке и доступна по цене, достаточно компактна, имеет.
При подготовке материала использовались источники:
https://makeabilitylab.github.io/physcomp/arduino/arduino-ide.html
https://arduino-ide.com/