ReShade
ReShade is a generic post-processing injector for games and video software developed by crosire. Imagine your favorite game with ambient occlusion, real depth of field effects, color correction and more . ReShade exposes an automated and generic way to access both frame color and depth information (latter is automatically disabled during multiplayer to prevent exploitation) and all the tools to make it happen.
The possibilities are endless! Add advanced depth-edge-detection-driven SMAA antialiasing, screen space ambient occlusion, depth of field effects, chromatic aberration, dynamic film grain, automatic saturation and color correction, cross processing, multi-pass blurring . you name it.
ReShade supports all of Direct3D 9, Direct3D 10, Direct3D 11, Direct3D 12, OpenGL and Vulkan.
A computer with Windows 7 SP1, 8.1, 10 or 11 and .NET Framework 4.6.2 or higher installed is required.
ReShade features its very own shading language and compiler, called ReShade FX. The syntax is based on HLSL, adding useful features designed for developing post-processing effects: Define and use textures right from the shader code, render to them, change renderstates, retrieve color and depth data, request custom values like timers or key states, .
And that’s not it. Write your shaders just once, they’ll work everywhere, regardless of your target being Direct3D or OpenGL: ReShade takes care of compiling them to the right shader model and language (HLSL, GLSL or SPIR-V).
ReShade 5.0 introduced a powerful add-on API that makes it possible to write add-ons for both ReShade and the games it is used with. For more information check out the documentation.
Open Source
As of January 1st 2017, ReShade is open sourced under the terms and conditions of the BSD 3-clause license! You can help development with your own contributions via the official GitHub repository.
Что за программа reshade
8 years 3 months ago #1 by Ganossa Tutorial (for users) was created by Ganossa
HowTo-USE
Since you came to this thread, it seems you want to get familiar with how to use the ReShade Framework. In the following, you can find a basic introduction to its structure and explanations on how to apply and adjust existing effects to your liking.
1. ReShade Framework Structure (basic)
To better explain the structure, we split it into two levels.
Level 1 (binary level)
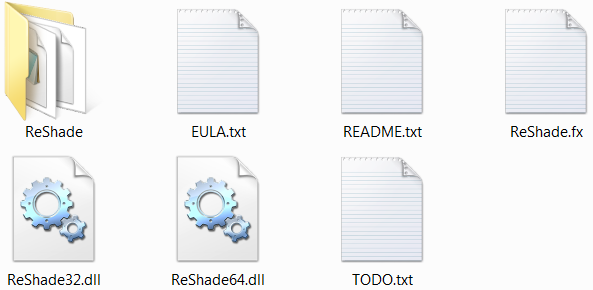
The first (binary) level is where all the ReShade binaries are located. Same as in previous (stand-alone) version of ReShade, there is also a ReShade.fx file which is loaded first by the compiler. As a user, you will need to change lines in the ReShade.fx file to reorder effects of the framework. More about that in section 2.2 HowTo Reorder Effects.
Level 2 (settings level)
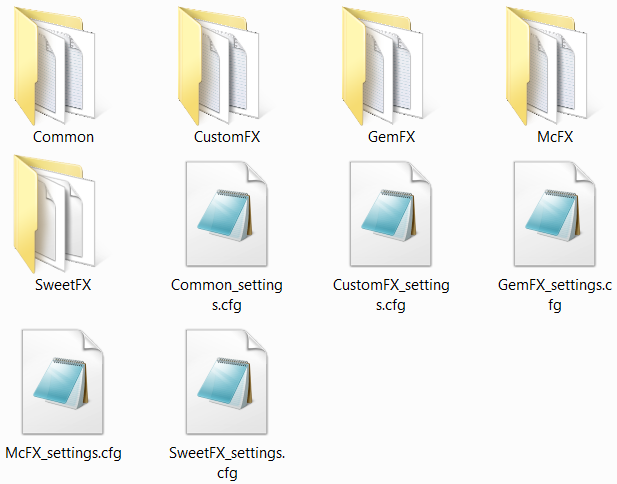
The ReShade folder of the first level contains the second (settings) level which holds the settings file to each individual (and the global) suite. People that used SweetFX before will be used to the structure of those files. In the setting files, the user can activate and modify individual effects. More to that in section 2.1 HowTo Apply and Adjust Effects.
2. ReShade Framework Effects
Since you should know now everything important (for a user) about the ReShade Framework structure, this section will help you with changing variables and ordering of effects.
2.1 HowTo Apply and Adjust Effects
Everyone that is already familiar with the SweetFX structure should also get easily along with this part of the ReShade settings. As mentioned before, each settings file is related to an individual suite. At the beginning of each settings file, you can find the individual effects which can be toggled on and off by setting their value to 1 or 0. Below of that section in the settings file, you can adjust the settings of each effect to your linking. Global effects (such as splitscreen or border) can be found in the Common_settings.cfg.
2.2 HowTo Reorder Effects
Reordering of all effects is done in the ReShade.fx file which can be found in the first (binary) level. All available effects are listed below the «Effect Ordering» section in that file. To reorder an effect, you simply rearrange the lines. The first line will be executed at first and the last line will be executed at the end.
Reordering of Effects in the ReShade.fx file
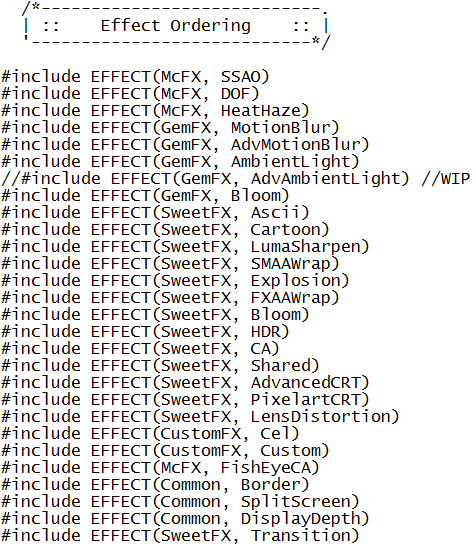
Using the SweetFX suite, you will notice that some of the effects are not listed here (such as Curves or Vibrance). For efficiency, all these effects are packed in a shared shader (EFFECT(SweetFX,Shared)) which you can find in the effect ordering. This means, it is not possible to reorder these effects individually but all at once.
Certain effects are supposed to be executed first (such as SSAO and DOF) or last (such as Border and Splitscreen), so you are advised to leave them at the start. Further, some effects are based on the output of previous effect and therefore look different when you reorder them (which is the purpose of the reordering feature) but there are also some effects (such as ambient light) that are based on the original image rather than the output of the previous effect. More to why effects differ in that way and other details about the ReShade Framework, you can find out in the «Tutorial for Developers».
3. Shader Specific Tutorials
In this section you can learn more about specific shader that might not be self-evident.
3.1 How To Use the UI-Mask Shader
The UI-Mask shader is part of the general/common ReShade shader. It uses a mask which has black to white gradients to determine where effects get applied. The mask you can find in /ReShade/Common/Textures. Activation and all options of the UI-Maks shader you can find in the /ReShade/Common_settings.cfg file. When setting RFX_UIMask_Direct to 0, you will get the default behavior described above which loads the texture from disk.
The difference to usual UI-Mask shader is the RFX_UIMask_Helper which, on pressing the RFX_UIMaskReset_HelperKey, will start detecting static elements on the screen and draw everything else white (you will need to move in the game to help that process). RFX_UIMask_Tolerance determines how accurate/tolerant this detection process is. The higher that value the smoother is the transition to those static UI-Elements (helps especially if the algorithm does not catch all static UI elements). Once that process is done, you can press print screen on your keyboard to output the mask to disk (it is basically the ReShade screenshot). You can then use that screenshot to edit it further and overwrite the original mask texture.
Alternatively, you can set RFX_UIMask_Direct to 1 so it will load the UI-Mask you identified/created with the helper directly from memory instead of the texture on disk. Therefore, you first have to activate the RFX_UIMask_HelperKey in the game to create the mask and after pressing it again the mask will be automatically applied.
To reset the detected UI-Mask you can hit the RFX_UIMaskReset_HelperKey which will set the UI-Mask back to black. Before starting over with the detection you have to press the RFX_UIMaskReset_HelperKey once more to stop the resetting of the UI-Mask.
4. ReShade Framework Video Tutorial for Users
При подготовке материала использовались источники:
http://static.reshade.me/
https://reshade.me/
https://reshade.me/forum/general-discussion/393-tutorial-for-users