Swift. A powerful open language that lets everyone build amazing apps.
Swift is a robust and intuitive programming language created by Apple for building apps for iOS, Mac, Apple TV, and Apple Watch. It’s designed to give developers more freedom than ever. Swift is easy to use and open source, so anyone with an idea can create something incredible.
Developers are doing
great things with Swift.
Swift is a fast and efficient language that provides real-time feedback and can be seamlessly incorporated into existing Objective-C code. So developers are able to write safer, more reliable code, save time, and create even richer app experiences.
A beautiful app using Swift. Thanks to its ease of use and real-time feedback, VSCO chose Swift to build the latest version of their photography app for iOS.
Great apps
built using Swift.
More and more developers are incorporating Swift code into their apps. And some are even building all-new apps entirely in Swift.
Lyft Khan
Academy Clear Sky Guide
LinkedIn Kickstarter Eventbrite Hipmunk
Better performance
equals better apps.
Swift apps more than live up to the name. For instance, a common search algorithm completes much faster using Swift.
Up to 2.6 X faster than Objective-C
Up to 8.4 X faster than Python 2.7
10,000 integers found in a graph
using depth-first search algorithm*
Educators are adding Swift
to their curriculum.
Developers aren’t the only ones who’ve experienced the potential of Swift. Universities and academic institutions around the world teach with Swift and Xcode on Mac, empowering their students with the best tools to build amazing apps. And with Apple’s free Develop in Swift curriculum, the transition from introductory coding to app development with Swift has never been easier.
Colleges and universities that are incorporating Swift into their courses
- Aberystwyth University
- Borough of Manhattan
Community College - California Polytechnic State University
- Central Piedmont Community College
- Foothill College
- Full Sail University
- Houston Community College System
- Ingésup
- Lawson State Community College
- Mesa Community College
- Northwest Kansas Technical College
- Plymouth University
- RMIT University
- Southern Methodist University
- Stanford University
- Technical University of Munich
- Tecnológico de Monterrey
- University of California, Santa Cruz
Swift is everywhere.
And now it’s open for everyone.
Swift is free and open source, and it’s available to a wide audience of developers, educators, and students under the Apache 2.0 open source license. We’re providing binaries for macOS and Linux that can compile code for iOS, macOS, watchOS, tvOS, and Linux. And to help Swift grow into an even more powerful language, we created a community where users can contribute directly to the Swift source code.
Get started with Swift.
The Definitive Book
Download The Swift Programming Language from the Apple Books Store free. Learn how Swift makes programming easier, more flexible, and more fun.
Xcode
Xcode is the Mac app used to build every other Mac app and every iOS app, too. It has all the tools you need to create an amazing app experience. And it’s available as a free download from the Mac App Store.
Developer Website
Get detailed technical information and an advanced overview of Swift. Check out the developer blog and stay up to date on the latest news. And enjoy free access to great resources like guides, videos, and sample code.
Everyone Can Code
A new approach to coding that gives everyone the power to learn, write, and teach code.
Swift Playgrounds
Learn serious code on your iPad. In a seriously fun way.
Apple Footer
- * Testing conducted by Apple in October 2014 using production 1.4GHz Intel Core i5-based 13-inch MacBook Air systems with 4GB of RAM and prerelease OS X v10.10. Performance will vary based on system configuration, network connection, and other factors.
Знакомьтесь, Swift!
2 июня на конференции WWDC 2014 Apple представила новый объектно-ориентированный язык программирования — Swift. Я думаю, многие уже успели посмотреть, что из себя представляет этот язык (Swift — нововведения), поэтому я не буду останавливаться на нововведениях. Я предлагаю создать простенький проект на языке Swift, чтобы понять на деле основные отличия от привычного Obj-C.
Подготовка
Для начала необходимо установить Xcode 6 Beta. Скачать его можно отсюда:
https://developer.apple.com/devcenter/ios/index.action
Скачиваем, устанавливаем и открываем (проблем с установкой не должно возникнуть, beta версия ставится как отдельное приложение и на основной Xcode никак не влияет).
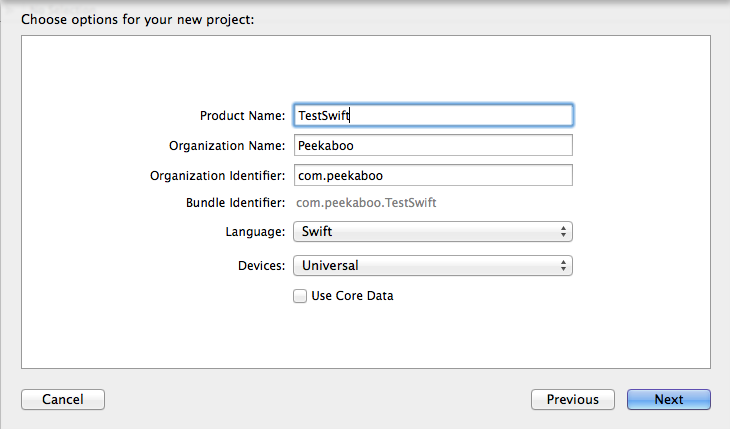
Создаем новый проект (Single View Application) -> вводим название проекта и не забываем выбрать язык Swift!
Структура
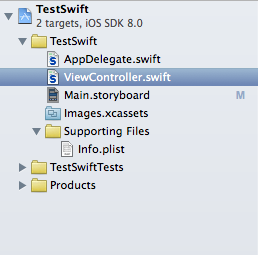
Обратите внимание на структуру, количество файлов теперь в 2 раза меньше, теперь нет необходимости в заголовочных файлах. Код, написанный в глобальной области используется в качестве точки входа для программы, так что больше не нужна функция main.
Вот как выглядит теперь AppDelegate:
import UIKit @UIApplicationMain class AppDelegate: UIResponder, UIApplicationDelegate < var window: UIWindow? func application(application: UIApplication, didFinishLaunchingWithOptions launchOptions: NSDictionary?) ->Bool < // Override point for customization after application launch. return true >func applicationWillResignActive(application: UIApplication) < // Sent when the application is about to move from active to inactive state. This can occur for certain types of temporary interruptions (such as an incoming phone call or SMS message) or when the user quits the application and it begins the transition to the background state. // Use this method to pause ongoing tasks, disable timers, and throttle down OpenGL ES frame rates. Games should use this method to pause the game. >func applicationDidEnterBackground(application: UIApplication) < // Use this method to release shared resources, save user data, invalidate timers, and store enough application state information to restore your application to its current state in case it is terminated later. // If your application supports background execution, this method is called instead of applicationWillTerminate: when the user quits. >func applicationWillEnterForeground(application: UIApplication) < // Called as part of the transition from the background to the inactive state; here you can undo many of the changes made on entering the background. >func applicationDidBecomeActive(application: UIApplication) < // Restart any tasks that were paused (or not yet started) while the application was inactive. If the application was previously in the background, optionally refresh the user interface. >func applicationWillTerminate(application: UIApplication) < // Called when the application is about to terminate. Save data if appropriate. See also applicationDidEnterBackground:. >> Hello World
Изучение любого языка начинается с Hello World. Не станем нарушать традицию. Откройте AppDelegate.swift и добавьте в func application(application: UIApplication, didFinishLaunchingWithOptions launchOptions: NSDictionary?) -> Bool строку:
println("Hello World") //Выводит в консольЗапустите программу и вы увидите в консоли заветный Hello World. Вот так все просто.
Усложним
Немного усложним проект. Добавим любимый TableView.
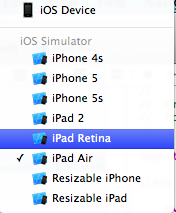
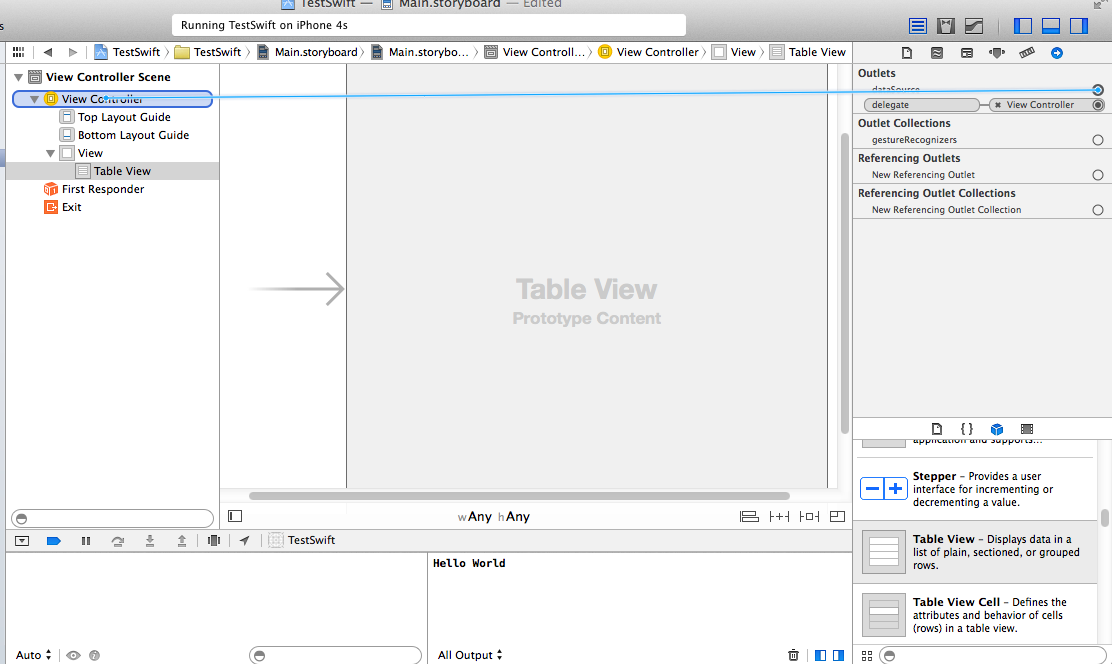
Открываем Main.storyboard. Кстати, обратите внимание что для универсального приложения теперь по умолчанию создается не два storyboard, как было раньше, а всего лишь один. Количество симуляторов тоже увеличилось:
Находим в Object Library заветный Table View и переносим его на экран приложения. Растягиваем таблицу, чтобы она была на весь экран (необходимо, чтобы она совпадала с краями).
Дальше все делается как и раньше, нам нужно задать для таблицы dataSource и delegate. Для этого открываем Connection Inspector, от delegate тянем к объекту ViewController и аналогично для dataSource.
Во ViewController.swift нужно указать протоколы, которые нам понадобятся: UITableViewDataSource и UITableViewDelegate
Теперь это можно сделать так:
class ViewController: UIViewController, UITableViewDataSource, UITableViewDelegateКомпилятор сразу ругнется:
Type ‘ViewController’ does not conform to protocol ‘UITableViewDataSource’
Компилятор сообщает нам, что мы не определили функции протокола ‘UITableViewDataSource’ . Чтобы посмотреть какие функции нужно определить, зажмите command + кликните по протоколу.
protocol UITableViewDataSource : NSObjectProtocol < func tableView(tableView: UITableView!, numberOfRowsInSection section: Int) ->Int func tableView(tableView: UITableView!, cellForRowAtIndexPath indexPath: NSIndexPath!) -> UITableViewCell!Вот эти две функции и необходимо добавить в наш ViewController.swift
Первая функция должна возвращать количество строк в таблице (Int):
func tableView(tableView: UITableView!, numberOfRowsInSection section: Int) -> Int
А вторая функция возвращает ячейку таблицы:
func tableView(tableView: UITableView!, cellForRowAtIndexPath indexPath: NSIndexPath!) -> UITableViewCell!
В первой строчке создаем ячейку. Разберем запись подробней:
let означает, что мы создаем константу, а не переменную.
let cell: UITableViewCell сообщаем, что тип этой константы будет UITableViewCell. По идее, необязательно сообщать какой тип будет у константы или переменной. Программа будет прекрасно работать и так:
let cell = UITableViewCell(style: UITableViewCellStyle.Subtitle, reuseIdentifier: "MyTestSwiftCell")Но как мне кажется, лучше все-таки сообщать, Apple дает хороший пример почему:
let implicitInteger = 70 let implicitDouble = 70.0 let explicitDouble: Double = 70Напомню, как мы создавали ячейку в Obj-C:
UITableCell *cell =[[UITableCell alloc] initWithStyle:UITableViewCellStyleSubtitle reuseIdentifier:@"MyTestSwiftCell"]Не нужен больше alloc, Swift все делает самостоятельно. Все методы, которые начинались с init были убраны, и теперь инициализация происходит в стиле Swift (т.е MyClass()). Причем инициализаторы с with тоже были преобразованы, то что шло после with — стало первым аргументом в инициализаторе Swift.
Вот эта запись мне особенно сильно понравилась:
cell.text = "Habrapost \(indexPath.row)"В Obj-C, чтобы сделать простую операцию конкатенацию строк, нужно было изгаляться следующим образом:
cell.text = [NSString stringWithFormat:@"Habrapost %@", indexPath.row];По мне, так это приятное изменение.
Скажем теперь мы захотели изменить цвет текста на стандартный фиолетовый. Сделать это можно аналогично тому как было в Obj-C, обратимся к методу класса
cell.detailTextLabel.textColor = UIColor.purpleColor()
В итоге, получаем
Немного о playground
Playground — это площадка, где можно поэкспериментировать, и если понравиться перенести в основной проект.
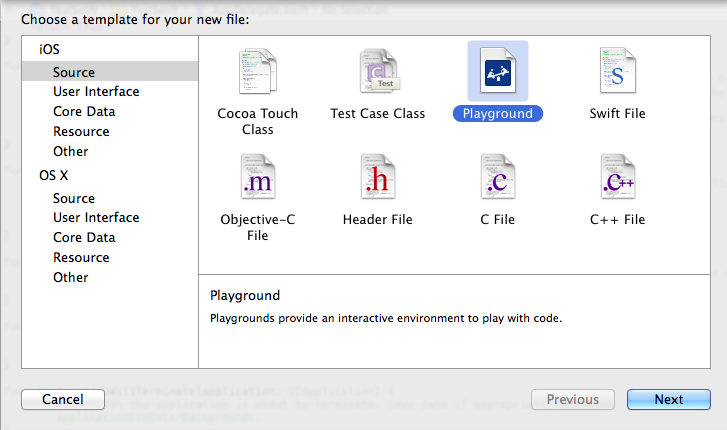
Для того, чтобы создать playgroung выберете File->New->File:
Вот и все, можно экспериментировать. Например, я добавила ячейку таблицы, чтобы увидеть как она будет выглядеть.

Подробней почитать можно здесь https://developer.apple.com/.
Заключение
На первый взгляд, мне язык понравился. Довольно легко будет перейти от Obj-C на Swift, к тому же Swift прекрасно уживается с Obj-C. Количество кода уменьшилось в разы, читаемость при этом увеличилась. С памятью теперь вообще возиться не надо, все это делает Swift.
При подготовке материала использовались источники:
https://www.apple.com/swift/
https://habr.com/ru/articles/225297/